Brazing Copper vs Soldering Copper: What’s the Difference?
When it comes to joining copper components, the methods of brazing and soldering often come into play. But what distinguishes…
When it comes to soldering copper pipes, choosing the right torch is as crucial as the solder itself. Whether you’re a DIY enthusiast or a seasoned plumber, the quest for the best torch can be daunting. With options ranging from propane to MAPP gas, each torch brings its own set of features, benefits, and challenges. Are you wondering which torch will efficiently tackle those 3/4-inch copper pipes without overheating your fittings? Or perhaps you’re curious if the convenience of auto-ignition is worth the investment for your DIY plumbing projects. This comparative guide delves into the nitty-gritty of torch selection, pitting popular models against each other, and offering insights into their performance, cost-effectiveness, and suitability for various project scales. Join us as we explore the world of torches, shedding light on the perfect tool for your copper pipe soldering needs. Which torch will emerge as the ultimate champion? Let’s find out.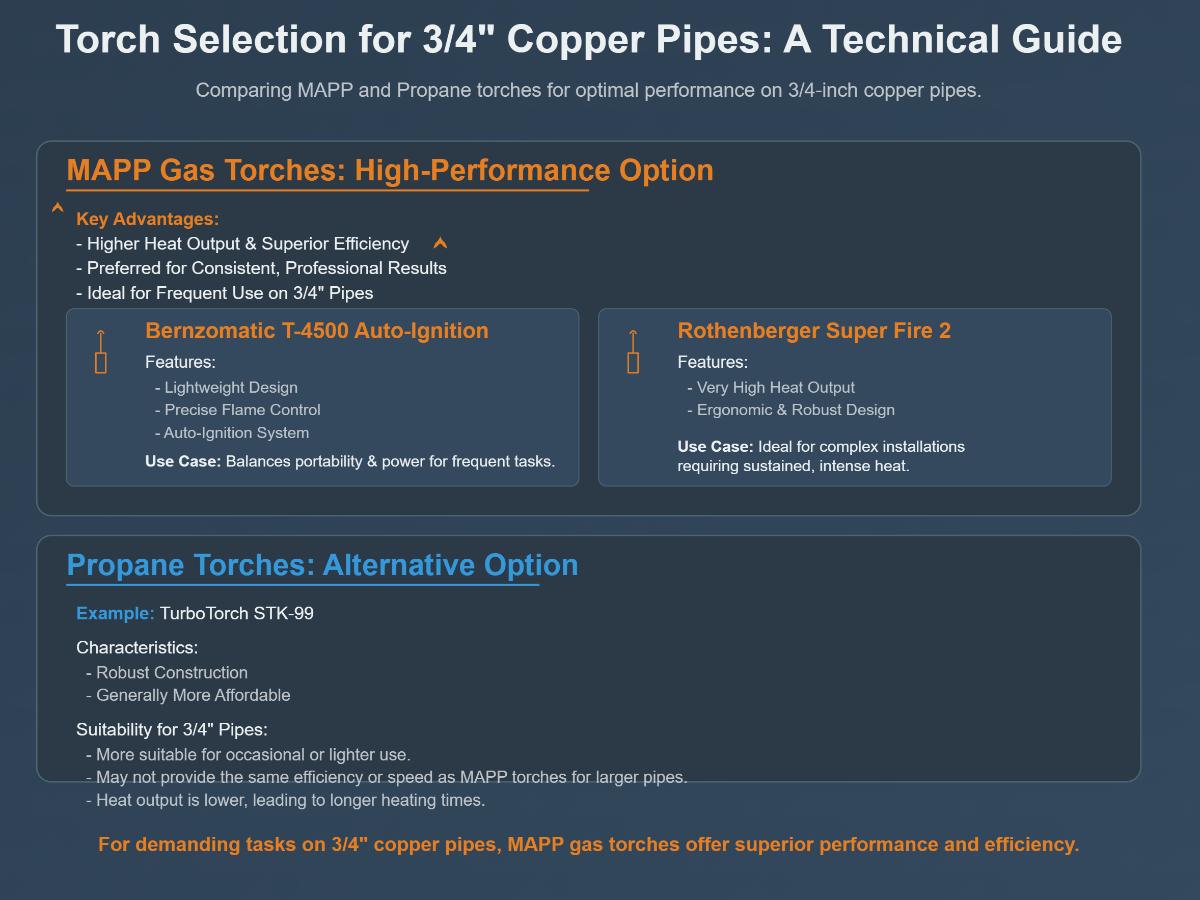
When selecting a torch for soldering copper pipes, heat output is a critical factor. Different torches produce varying levels of heat, directly impacting the efficiency and quality of the soldering process.
The cost of fuel is an important consideration when choosing a torch. Different fuels vary in price and availability, affecting the overall operating expense and ease of use.
Depending on the scale of the project, different torches offer varying levels of suitability. This can range from small home repairs to large-scale industrial applications.
When comparing torches, several features should be evaluated to determine the best choice for your needs.
This feature makes starting the torch safer and quicker. It eliminates the need for external ignition sources, enhancing safety and convenience.
Ergonomically designed handles reduce hand fatigue during prolonged use, important for professionals and serious DIYers.
Allows adaptation to different pipe sizes and soldering conditions, enhancing versatility. Present in both propane and MAPP gas torches, it provides precise control over flame size.
The performance of a torch in real-world applications is a crucial factor for both DIY enthusiasts and professionals.
Provides reliable performance for small to medium-sized projects. The pencil-tip flame offers precise control, making it ideal for detailed work.
Delivers faster heating and better flame control for larger pipes. The rosebud-shaped flame distributes heat better, which improves soldering quality.
Offers unparalleled heat output for heavy-duty tasks. However, its complex safety requirements make it less suitable for standard plumbing jobs.
Evaluating the cost-benefit ratio of propane and MAPP gas torches helps determine the most economical choice for your needs.
It has a lower upfront cost and cheaper fuel. Ideal for DIY projects and occasional use, providing sufficient heat for small to medium pipes.
Higher initial cost and fuel expenses. Preferred for professional-grade tasks due to faster heating and better flame control, justifying the higher expense.
Understanding the differences in fuel composition and flame temperature between propane and MAPP gas torches is crucial for selecting the right tool for soldering copper pipes.
Propane is a widely used fuel for heating, soldering, and cooking. It burns at approximately 3,600°F (1,982°C). This temperature is sufficient for many household and light industrial tasks. Propane torches are ideal for smaller-scale projects and general plumbing tasks due to their slightly lower maximum temperature compared to MAPP gas.
MAPP gas, originally a blend of methylacetylene, propadiene, and propane, has now been replaced with MAP-Pro blends containing propylene and propane. It burns hotter at around 3,730°F (2,054°C). The higher flame temperature allows for faster heating of copper pipes and improves performance in soldering and brazing applications. This makes MAPP gas torches better suited for larger or more demanding projects.
Heating efficiency and performance are key factors when comparing propane and MAPP gas torches.
Propane torches offer moderate heating efficiency, which is adequate for most household copper soldering tasks. Although propane heats a bit slower than MAPP gas, it still meets the requirements for typical plumbing soldering projects. Its affordability and wide availability make it a popular choice for DIY enthusiasts.
MAPP gas torches provide superior heating efficiency due to their hotter flame. Copper pipes heat faster with MAPP gas, reducing soldering time and enhancing joint quality. This is particularly beneficial for thicker pipes or when working outdoors in colder conditions, making MAPP gas torches the preferred option for professional and high-demand applications.
Compatibility and ease of use are important considerations when selecting a torch.
Propane torches are widely available and simpler in design. They are typically cheaper and easy to use. Many propane torches can also run on MAPP gas if marked “dual fuel.” However, using MAPP gas in a propane torch not designed for it can cause premature wear or safety issues, and may void warranties.
MAPP gas torches often require specially designed torch heads rated for the higher flame temperature and pressure. These torch heads are engineered to handle the intense heat and pressure of MAPP gas, ensuring safety and optimal performance. Some MAPP torch heads are designed to work well upside down, which is useful for certain pipe orientations and professional applications.
Cost and availability play a significant role in choosing between propane and MAPP gas torches.
| Feature | Propane Torch | MAPP Gas Torch |
|---|---|---|
| Fuel Cost | Lower; propane is less expensive and widely available | Higher; MAPP gas (or its substitutes like MAP-Pro) costs more per unit |
| Torch Cost | Generally lower upfront cost | Slightly higher due to specialized design and materials |
| Fuel Availability | Very common in hardware stores and refill stations | Available but less common; original MAPP discontinued in 2008, replaced by similar blends (MAP-Pro) |
| Storage & Handling | Easier to store, less volatile | Requires careful handling due to hotter flame and pressure |
For users who frequently solder or work on more demanding projects, the higher cost of MAPP gas may be justified by its superior performance. Conversely, those with occasional or lighter tasks might find propane more cost-effective.
Safety and practical use are critical when handling any torch.
Propane is generally considered safer and easier to manage, with fewer risks of unexpected accidents. Its flame is slightly cooler and thus more forgiving for beginners and general household use. Proper ventilation and safety precautions are still necessary when soldering copper pipes.
MAPP gas produces a more intense flame, which can pose greater burn hazards if mishandled. It was discontinued in its original form in 2008 in North America due to safety concerns and volatility. Despite this, MAPP gas (or its substitutes like MAP-Pro) remains a valuable tool for professional applications, requiring careful handling and appropriate safety measures.
Evaluating the suitability of propane and MAPP gas torches for copper pipe soldering based on various criteria:
| Criteria | Propane Torch | MAPP Gas Torch |
|---|---|---|
| Heating Speed | Moderate; sufficient for most plumbing soldering | Faster heating; better for thicker pipes and challenging conditions |
| Flame Temperature | ~3,600°F | ~3,730°F |
| Ease of Use | Simple and widely compatible | Requires compatible torch heads; dual-fuel models available |
| Cost Efficiency | More cost-effective for occasional use | Higher fuel cost but more efficient for frequent/heavy-duty use |
| Safety | Lower flame temperature, easier to control | Higher flame temperature, increased burn risk |
| Availability | Widely available | Available; original MAPP discontinued, substitutes exist |
Selecting the appropriate torch for soldering copper pipes requires balancing budget, frequency of use, and heating requirements to ensure optimal performance and safety.
| Feature | TurboTorch | Bernzomatic TS4000 |
|---|---|---|
| Fuel | Typically MAPP gas or propane | Propane/MAPP gas (hybrid option) |
| Flame Shape | Rosebud-shaped flame (broad, enveloping joint) | Pencil-tip flame, adjustable |
| Heat Output | High heat, suitable for fast heating | Hotter than propane alone due to MAP gas mix |
| Flame Control | Adjustable, precise for copper pipe work | Adjustable flame with trigger start |
| Aspect | TurboTorch | Bernzomatic TS4000 |
|---|---|---|
| Ignition | Manual or auto-ignition depending on model | Auto-ignition trigger start (convenient) |
| Ergonomics | Designed for professional use, comfortable grip | Lightweight, portable, trigger start for ease |
| Flame Adjustment | Precise flame control for delicate work | Adjustable flame control, user-friendly |
| Criteria | TurboTorch | Bernzomatic TS4000 |
|---|---|---|
| Cost | Higher | More affordable |
| Value for Money | Professional-grade performance | User-friendly and efficient for home use |
Choosing the appropriate torch for soldering copper pipes largely depends on the pipe size. Different torches are optimized for different pipe sizes, affecting their efficiency and ease of use.
For small pipes, typically up to ½ – inch in diameter, propane torches are an excellent choice. These torches deliver just the right amount of heat for soldering, minimizing the risk of overheating. The pencil – tip flame of a propane torch allows for precise control, making it ideal for detailed work on small fittings.
Key Features:
Recommended Models:
For larger pipes, such as those ¾ – inch and above, MAPP gas torches are preferred due to their higher heat output. MAPP gas burns approximately 15% hotter than propane, ensuring faster heating and more efficient soldering. This is especially useful for professionals who need efficient and quick soldering.
Key Features:
Recommended Models:
For heavy – duty industrial applications, acetylene torches are the best option. These torches produce very high heat, up to 6,300°F, making them suitable for welding and cutting thick metal pipes. However, because of their complexity and the strict safety measures required, acetylene torches are not recommended for typical home use.
Key Features:
When working with ¾ – inch copper pipes, selecting a torch that can efficiently heat and solder these pipes is crucial. MAPP gas torches are generally preferred for this pipe size due to their superior heating capabilities.
When selecting a torch based on pipe size compatibility, several factors should be taken into account:
Based on the pipe size and the required heat output, here are some top torch recommendations:
To ensure optimal soldering results and safety, consider the following best practices:
Proper joint preparation is crucial for achieving a strong, leak-free solder joint. Follow these steps for both propane and MAPP gas torches:
The heating method varies slightly between propane and MAPP gas torches due to their different heat outputs.
Flux is an essential component in the soldering process, particularly when working with copper pipes. Its primary functions are:
Applying flux correctly guarantees strong and dependable solder joints, reducing the likelihood of leaks and corrosion.
Regular flux, also known as standard paste, acts as a cleaning and wetting agent. It is used with separate solder application, allowing professionals to control the flow and integrity of the solder joint.
Tinning flux contains solder powder, which pre-tins the fitting and pipe. This simplifies the soldering process, making it easier for beginners by combining cleaning and soldering prep, ensuring better adhesion and faster joint filling.
Formulated to resist separation and oxidation in high temperatures, hot weather flux maintains consistency in hot environments, which is crucial for soldering in such conditions.
With a thicker consistency, gel flux adheres to vertical or overhead pipes without dripping, making it ideal for precision work in challenging positions.
To achieve optimal results, follow these steps:
The interaction between flux and torch heat is critical:
Propane torches offer moderate, adjustable heat, making them ideal for most flux types. They are widely available, affordable, and versatile, but require skill to avoid overheating the flux.
Propane torches are popular for residential plumbing because they are affordable and easy to use. However, users must be aware of several safety considerations.
Propane torches emit carbon monoxide (CO), a potentially dangerous gas if inhaled in large quantities. Proper ventilation is essential while using a propane torch. This can be achieved by opening windows and using fans to circulate air, thus reducing the risk of CO buildup.
Proper flame control is critical to avoid overheating the joints. An adjustable flame is recommended, typically set to a length of 1–2 inches. This helps prevent the burning of flux and weakening of solder bonds, ensuring a strong and reliable joint.
Using propane torches near flammable materials poses a significant fire hazard. Employing heat shields made of flame-retardant barriers or metal sheets can protect surrounding areas. Additionally, always have a Class ABC fire extinguisher nearby as a precaution.
Users should wear welding gloves (preferably not cloth) and safety glasses to protect against burns and eye injuries, as proper protective gear is crucial when handling a propane torch.
Acetylene torches are favored in professional settings for their high heat output, making them suitable for larger pipes and industrial applications. Despite their efficiency, they require strict safety measures.
Acetylene torches can reach temperatures up to 6,300°F, significantly increasing the risk of burns. Adherence to ANSI/AWS Z49.1 standards is mandatory to ensure safe operation, especially in confined spaces.
Acetylene is unstable under pressure, necessitating careful handling of cylinders and torch nozzles. Regular inspections for defects in seals and nozzles are imperative to prevent accidents.
Because acetylene torches emit CO and reach high temperatures, good airflow is essential to prevent CO buildup, especially in confined spaces.
LP gas torches, similar to propane, are preferred for their precision in tight spaces. Despite their advantages, they also have specific safety considerations.
The narrower flame of LP gas torches allows for precise heating, reducing collateral heat. However, holding the torch too close can cause localized overheating, leading to potential pipe warping.
Before ignition, it is crucial to check hoses and connections for leaks. Ensuring that all connections are secure and free from defects will prevent gas leaks and potential accidents.
Keep the torch at least 12 inches away from joints to prevent pipe warping. Proper flame management and distancing are key for safe operation.
Electric resistance soldering tools are an alternative to flame-based torches, especially useful in sensitive environments where open flames are not permissible.
These tools pose electrical hazards, particularly in wet conditions. Ensuring Ground Fault Circuit Interrupter (GFCI) protection and working in dry conditions minimizes the risk of electric shock.
Electric resistance tools may not be ideal for large-diameter pipes as they have a limited heat range. Prolonged heating can degrade flux, requiring careful handling to maintain joint integrity.
While eliminating fire risks associated with open flames, careful handling of hot electrodes is necessary to prevent burns. Users must be trained in handling these tools safely.
Prioritizing airflow is essential to mitigate CO and flux fume inhalation. Proper ventilation reduces health risks and ensures a safer working environment.
Applying a thin, even layer of flux prevents acid corrosion and ensures a strong bond. Excess flux should be removed pre-soldering to avoid complications.
Effective heat management means heating the fitting cups first and then sweeping the flame evenly. Test the joint’s readiness by touching the solder to check the temperature.
Allow joints to cool naturally; avoid water quenching as it can cause stress cracks. Natural cooling preserves the integrity of the soldered joint.
Below are answers to some frequently asked questions:
For 3/4-inch copper pipes, the best torch is typically a MAPP gas torch due to its higher heat output and efficiency. The Bernzomatic T-4500 Auto-Ignition MAPP Torch stands out as a top choice, offering lightweight design, precise flame control, and auto-ignition, making it highly recommended for frequent use on 3/4-inch pipes. It balances portability and power effectively. Another excellent option is the Rothenberger Super Fire 2, known for its high heat output and ergonomic design, which is ideal for complex installations requiring sustained heat. While propane torches like the TurboTorch STK-99 are robust and affordable, they are more suitable for occasional use and may not provide the same efficiency as MAPP torches for larger pipes. Therefore, for consistent, professional results, MAPP gas torches are preferable.
To avoid overheating when soldering small fittings, precise heat control and proper techniques are essential. Begin by positioning the flame perpendicular to the copper tube, not directly on the fitting cup, to ensure even heat distribution around the joint. Sweep the flame between the tube and the fitting cup to prevent localized hotspots. Select a torch with adjustable flame size and heat output to suit the scale of the fitting. Heat the joint only until the solder melts and flows, then promptly remove the heat to avoid damage. Clean the surfaces thoroughly and apply flux correctly to enhance heat transfer efficiency and minimize the need for excessive heating. Using these methods will help maintain the integrity of small fittings and achieve strong, reliable joints.
Auto-ignition is not strictly necessary for DIY plumbing, but it offers several advantages that can enhance the user experience. Auto-ignition torches, which ignite with the push of a button, provide increased safety by reducing the need to bring an external flame close to the gas outlet. This feature is particularly beneficial for beginners who may be less comfortable handling matches or lighters near open gas. Additionally, auto-ignition simplifies the lighting process, making it faster and more convenient, which is useful when working on multiple joints or needing to pause and adjust frequently.
However, torches with auto-ignition are generally more expensive and may require occasional maintenance or replacement of ignition components. Manual ignition torches, which rely on matches or lighters, are often more affordable and have fewer components that can fail. Many professional plumbers and experienced DIY enthusiasts successfully use manual ignition torches without issues, provided they follow proper safety precautions.
When selecting a torch for copper pipe soldering, consider fuel type and heat output: propane suits smaller pipes and DIY projects, MAPP gas is better for larger pipes and professional use, and acetylene is for heavy – duty work. Torch tip design matters too, with pencil tips for small fittings and rosebud/jet tips for larger pipes. Ensure pipe size compatibility, with propane for ≤¾” pipes, MAPP gas for ¾” – 2″ pipes, and acetylene or industrial MAPP for >2″ pipes. Flame control and safety features, flux and solder compatibility, as well as efficiency and cost, are also key criteria.
The best value for money in torches for soldering copper pipes depends on the user’s needs and frequency of use. For occasional DIY projects, the Bernzomatic TS3000 propane torch is a budget-friendly choice, priced around $20–$40. It is lightweight and sufficient for soldering 1/2-inch pipes, though it may struggle with larger pipes or high-melting-point solders.
For more frequent use or larger projects, the Bernzomatic TS4000 offers a versatile mid-range option. Compatible with both propane and MAPP gas, it features auto-ignition and effectively handles 3/4-inch pipes. While MAPP gas refills are more expensive, the TS4000 balances initial cost with dual-gas flexibility, making it a sound investment for regular users.
Professional-grade options like the TurboTorch by Thermodyne provide high BTU output, precise flame control, and durability, ideal for frequent, heavy-duty use. Despite a higher upfront cost (~$100–$150), its performance and longevity justify the expense for professionals.
To troubleshoot common soldering issues when using torches for copper pipes, it’s essential to understand the symptoms and causes of typical problems and implement effective solutions:
By addressing these common issues with proper heat control, adequate solder application, and thorough surface preparation, you can achieve strong, leak-free solder joints.

