Seasonal Sale! Enjoy 10% off on all machines, Request FREE Quote!

Step-by-Step Guide to Cleaning Metal Before Painting for Beginners

Are you ready to transform that rusty old metal piece into a gleaming work of art? Before you start painting, it’s crucial to clean the metal properly to ensure a flawless finish. If you’re a beginner looking for a straightforward guide, you’ve come to the right place. This article will walk you through each step of the process, from gathering essential materials like acetone and rust remover to applying a self-etching primer. You’ll learn how to inspect the surface, remove rust, and prepare the metal for painting with easy-to-follow instructions. So, grab your tools and let’s dive in—how do you think you can achieve that perfect, professional-looking paint job?

Understanding the Basics of Metal Surface Preparation

Definition of Metal Surface Preparation

Metal surface preparation involves cleaning and treating metal surfaces before applying coatings such as paint or primer. This step is crucial to ensure that the coatings adhere properly and last longer by removing any contaminants, rust, or old coatings that might be present on the metal surface.

Importance of Metal Surface Preparation Before Painting

Enhances Coating Adhesion

This step creates a clean, roughened surface that allows coatings to stick better, reducing the chances of peeling or flaking over time.

Increases Coating Durability

Removing rust, old paint, and other contaminants prevents issues that could compromise the new coating, extending the lifespan of the paint job.

Improves Aesthetic Finish

A well-prepared surface ensures that the paint or primer applies smoothly and evenly, resulting in a professional and visually appealing finish. This is particularly important for projects where appearance is critical, such as in automotive or decorative metalwork.

Prevents Future Corrosion

By thoroughly preparing the metal surface, you can apply rust inhibitors and primers to protect the metal from future rust and corrosion, enhancing the longevity of the structure.

Key Steps in Metal Surface Preparation

Cleaning

The first step in metal surface preparation involves cleaning the surface to remove dirt, grease, and other contaminants. This can be done using various cleaning agents, such as degreasers or specialized metal cleaners.

Rust and Old Coating Removal

Once the surface is clean, the next step is to remove any rust or old paint. This can be achieved using mechanical methods like sanding or wire brushing, or chemical methods like rust removers.

Surface Profiling

After removing contaminants and old coatings, the surface needs to be profiled, typically through abrasive blasting or sanding. This step roughens the surface, enhancing the adhesion of the primer and paint.

Priming

Safety Precautions

Proper Handling of Cleaning Materials

When preparing to clean metal surfaces, it’s important to handle all cleaning materials with care to ensure safety and effectiveness.

Chemical Handling

  • Read Labels: Read and follow the cleaning agent and solvent labels.
  • Avoid Mixing Chemicals: Never mix different chemicals unless explicitly directed by the manufacturer, as this can cause dangerous reactions.
  • Proper Storage: Store chemicals in their original containers, tightly sealed, and away from heat sources or open flames.

Tool Handling

  • Inspect Tools: Before use, inspect all tools for damage. Replace any worn or broken tools to avoid accidents.
  • Use Tools as Intended: Use each tool for its intended purpose. Misusing tools can lead to injury or ineffective cleaning.

Necessary Protective Gear

Wearing the right protective gear is crucial when cleaning metal surfaces to safeguard against chemical exposure and physical injuries.

Gloves

  • Chemical-Resistant Gloves: Use gloves made of materials that can resist chemicals, such as nitrile or neoprene, to protect your hands from harsh solvents and rust removers.

Goggles

  • Safety Goggles: Wear safety goggles to protect your eyes from splashes of chemicals and flying debris when using abrasive tools.

Respirator or Mask

  • Use a respirator with appropriate filters or a dust mask for light tasks to protect against inhaling harmful fumes and dust particles, ensuring a proper fit for effective protection.

Safe Disposal of Chemicals

Proper disposal of chemicals is essential to prevent environmental contamination and health hazards.

Follow Local Regulations

  • Disposal Guidelines: Follow local regulations for disposing of hazardous materials. Contact your local waste disposal facility if unsure.
  • Never Pour Down Drains: Do not pour chemicals down the drain as they can contaminate water supplies.

Use Proper Containers

  • Seal Containers: Use containers designed for hazardous waste and ensure they are sealed properly to prevent leaks.
  • Label Containers: Clearly label all disposal containers with their contents to avoid accidental misuse or mishandling.

Safe Working Environment

Creating a safe working environment minimizes the risk of accidents and exposure to harmful substances.

Ventilation

  • Work in a Well-Ventilated Area: Ensure good airflow by working outdoors or in a well-ventilated area to disperse fumes and vapors.
  • Use Fans: Use fans to enhance ventilation if working indoors.

Proper Lighting

  • Adequate Lighting: Ensure your workspace is well-lit to see what you are doing clearly and avoid accidents.

Keep Area Clear

  • No Clutter: Keep your workspace organized and free of unnecessary items to prevent tripping hazards.
  • Children and Pets: Keep children and pets away from the work area to avoid accidents.

Using Equipment Safely

Handling equipment safely is vital to prevent injuries and ensure effective cleaning.

Power Tools

  • Read power – tool instruction manuals and follow safety guidelines.
  • Use Safety Guards: Ensure all safety guards are in place and functioning.

Abrasive Tools

  • Proper Grip: Hold abrasive tools like wire brushes and sandpaper firmly to maintain control and avoid slippage.
  • Let the tool do the work; applying excessive force can make it slip and cause injury.

Best Practices During Cleaning

To prevent moisture and rust, avoid water – based cleaners that can leave moisture behind, which may lead to rust or poor paint adhesion. Ensure the metal surface is completely dry before priming or painting.

Materials and Tools You’ll Need

Essential Materials

Acetone or Mineral Spirits

Acetone and mineral spirits are essential for effectively removing grease and oils from metal surfaces. Acetone offers a quick and deep clean, perfect for removing tough grease and oils from metal surfaces. Mineral spirits, on the other hand, are a safer choice for new metal surfaces.

Rust Remover

Rust removers are crucial for eliminating rust; household vinegar works for minor cases, while specialized products like CLR or naval jelly tackle heavier rust.

Self – Etching Primer

A self – etching primer is designed to bond directly to bare metal. It provides a strong base for paint adhesion, ensuring a long – lasting paint job.

Mild Soap or Detergent

When dealing with mild steel surfaces, a mixture of mild soap or detergent and warm water is ideal. It can remove dirt and grime without causing damage to the metal.

Essential Tools

Rags

Rags are used to apply cleaning agents and wipe metal surfaces clean, preparing them for the next step.

Scuffing Pad or Sandpaper

Scuffing pads or sandpaper are used to lightly scuff the metal surface. This creates texture, which improves primer adhesion. Coarse sandpaper is great for removing old paint and rust.

Wire Brush or Wire Brush Drill Attachment

Wire brushes and wire brush drill attachments are useful for removing loose or flaking paint and surface rust. They can quickly clear the metal surface.

Safety Gear

Always wear protective gloves to shield your hands from harsh chemicals. Safety goggles protect your eyes from chemical splashes and debris, while a dust mask or respirator prevents inhalation of harmful fumes and dust.

Optional Tools

Angle Grinder, Orbital Sander, or Bristle Blaster

If you have extensive rust or need more thorough surface preparation, an angle grinder, orbital sander, or bristle blaster can be very helpful. These tools are used for rust removal and surface texturing, with the bristle blaster providing a more uniform finish.

Heat Gun

A heat gun can be used to soften old paint, making it easier to remove. This can save a lot of time and effort.

In-depth Analysis of Different Cleaning Agents

Pros and Cons of Various Solvents

Understanding the advantages and limitations of different cleaning agents is crucial for effective metal surface preparation. Here, we delve into the most commonly used solvents and their characteristics.

Mild Soap or Detergent

Mild soap or detergent is ideal for removing light contaminants such as dirt and grime without damaging the metal surface. It is non-toxic, generally safe for most metal surfaces, and easily accessible and inexpensive. However, it can’t effectively remove grease, oil, or heavy dirt and may leave a residue that needs to be rinsed off thoroughly.

Mineral Spirits

Mineral spirits are excellent for removing grease, oils, and other organic contaminants, providing ample working time for thorough cleaning due to their slower evaporation. On the downside, they are flammable, need careful use and proper storage, and emit fumes that necessitate good ventilation during use.

Acetone

Acetone dries rapidly, leaving no residue behind, and is highly effective at removing grease, oils, and some types of adhesives. However, it is highly flammable, requiring extreme caution, and its fumes can be harmful, necessitating proper ventilation and protective gear.

Rust Removers

Rust removers are specifically designed to remove rust and corrosion from metal surfaces and are available in different forms, including gels, liquids, and sprays, catering to varying levels of rust severity. However, some rust removers have strong chemicals that need careful use and disposal, and additional steps may be required to neutralize the surface before painting.

Choosing the Right Cleaning Agent for Your Project

Selecting the appropriate cleaning agent depends on the specific requirements of your project. Here are some guidelines to help you make the right choice:

Assess the Metal Surface

Identify whether the surface has dirt, grease, oil, or rust, and determine if the metal is new, lightly tarnished, or heavily corroded.

Consider the Cleaning Agent Properties

Choose an agent with the strength to remove the specific contaminants present on the metal, ensure it can be handled safely considering its flammability and toxicity, and confirm it is suitable for your preferred application method (e.g., wiping, spraying, soaking).

Practical Tips

If the surface is lightly dirty, start with mild soap or detergent and then try stronger cleaners if needed. Use mineral spirits for new metal, ideal for degreasing without the rapid evaporation of acetone. Reserve acetone for tough grease, using it when you need a powerful solvent to tackle stubborn grease and oils. Apply rust removers as needed, choosing one based on the severity of corrosion and following the manufacturer’s instructions for best results.

By understanding the pros and cons of each cleaning agent and evaluating the specific needs of your project, you can effectively prepare metal surfaces for painting, ensuring a professional and durable finish.

Step-by-Step Cleaning Process

Begin by inspecting the metal surface to identify rust, old paint, and contaminants. Use a wire brush or sandpaper (120-240 grit) to remove loose rust and debris, focusing on areas with visible rust and flaking paint.

Apply a rust remover to stubborn rust spots, following the manufacturer’s instructions. Let it sit for the recommended time, then remove the loosened rust with a wire brush or sandpaper.

Clean the entire metal surface with a rag dampened with acetone to remove grease, oil, and dirt.

Lightly scuff the surface with a scuffing pad or fine-grit sandpaper to help the primer adhere better, then wipe away any dust with a clean rag.

Priming and Painting Techniques

Applying Self-etching Primer: How and Why

Why Use a Self-etching Primer?

A self-etching primer is crucial for metal surfaces because it has acidic ingredients that etch the metal surface, creating a rough texture for the paint to adhere to. This type of primer also helps prevent rust and provides a strong foundation for the topcoat.

How to Apply Self-etching Primer

  1. Prepare the Surface: Shake the spray can vigorously for about two minutes if using one, then ensure the metal surface is clean, dry, and free of dust. Wipe it down with a clean cloth one last time before applying the primer.
  2. Apply the Primer: Hold the spray can 10-12 inches away from the surface and apply the primer in thin, even coats. If using a brush, dip it lightly into the primer and apply in smooth, even strokes.
  3. Drying Time: Allow the primer to dry completely, following the manufacturer’s recommended drying time, usually around 20-30 minutes.
  4. Inspect the Surface: Check for any missed spots or uneven coverage and apply a second coat if necessary.

Tips for a Smooth and Even Paint Finish

Selecting the Right Paint

Select paint made for metal surfaces. It will adhere well and protect against corrosion for a long time.

Application Techniques

  1. Multiple Thin Coats: Apply multiple thin coats rather than one thick coat. This helps prevent runs and drips, ensuring a smooth finish.
  2. Consistent Strokes: Use consistent, overlapping strokes when spraying or brushing to avoid streaks and achieve even coverage.
  3. Drying Time Between Coats: Allow each coat to dry thoroughly before applying the next. This is typically 10-15 minutes for spray paint and longer for brush-on paint.
  4. Temperature and Humidity: Paint in a well-ventilated area with low humidity and a temperature between 50°F and 90°F for best results.

Detailed Steps for Beginners

  1. Preparation: Ensure the metal surface is properly cleaned, rust-free, and primed.
  2. First Coat: Apply the first thin coat of paint. Use even, overlapping strokes, and if using spray paint, keep a 10-12-inch distance from the surface.
  3. Drying Time: Let the first coat dry completely, following the paint manufacturer’s instructions.
  4. Subsequent Coats: Apply additional coats as needed, allowing each coat to dry fully before the next application.
  5. Final Inspection: After the final coat has dried, inspect the surface for any missed spots or imperfections. Touch up as necessary.

Common Mistakes and How to Avoid Them

  1. Skipping Primer: Never skip the priming step. It ensures better paint adhesion and durability.
  2. Thick Coats: Don’t apply thick paint coats, as they can cause runs and uneven drying.
  3. Poor Surface Preparation: Ensure the surface is clean, dry, and free of rust before painting. Any contaminants can affect the paint’s adherence and finish.
  4. Inadequate Drying Time: Rushing the drying process can result in a poor finish. Always allow adequate drying time between coats.
  5. Incorrect Tools: Use the right tools for the job. For large surfaces, a spray gun can provide a more even finish than a brush.

Comparative Review of Primers

Types of Primers

Selecting the appropriate primer for metal surfaces is crucial for achieving a durable and smooth paint finish. Here, we will review the different types of primers and their characteristics to help you make an informed decision.

Oil-Based Primers

Advantages:

  • Superior Adhesion and Protection: Oil-based primers adhere well to metal surfaces, offering excellent protection against rust and corrosion, making them ideal for outdoor and industrial applications.
  • Durability: Known for their long-lasting performance and resistance to wear and tear.

Disadvantages:

  • Environmental Concerns: These primers contain volatile organic compounds (VOCs), which can be harmful to the environment and human health. They are subject to stricter regulations in some regions.
  • Cleanup: Requires the use of solvents such as mineral spirits for cleanup, which can be messy and challenging.

Water-Based Primers

Advantages:

  • Ease of Use: Water-based primers are easy to apply and clean up with soap and water.
  • Low VOCs: They have lower levels of harmful emissions, making them more environmentally friendly and safer to use indoors.
  • Quick Drying: Typically dry faster than oil-based options, allowing for quicker project completion.

Disadvantages:

  • Less Protective: Water-based primers may not provide the same rust and corrosion protection as oil-based primers, making them less suitable for harsh conditions.
  • Adhesion: They may not adhere as well to slick or non-porous metal surfaces, potentially leading to peeling or flaking.

Self-Etching Primers

Advantages:

  • Strong Bonding: Contain acidic components that etch the metal surface, creating a rough texture for better paint adhesion.
  • Corrosion Protection: Provide excellent protection against rust, making them ideal for bare metal surfaces.
  • Versatility: Suitable for a variety of metals, including aluminum, steel, and galvanized metal.

Disadvantages:

  • Preparation: Requires thorough surface preparation to ensure optimal performance, including cleaning and degreasing.
  • Application: May require multiple coats to achieve desired coverage and protection.

Rust-Inhibitive Primers

Advantages:

  • Rust Treatment: Contain rust inhibitors that help treat and prevent rust on metal surfaces.
  • Dual Function: Act as both a primer and a rust converter, making them a convenient option for surfaces with existing rust.
  • Durability: Provide long-lasting protection against further corrosion, extending the life of the metal surface.

Disadvantages:

  • Surface Compatibility: May not be suitable for all types of metal surfaces, particularly those that are heavily corroded.
  • Cost: Can be more expensive than standard primers due to their specialized rust-inhibiting properties.

Best Primers for Metal Surfaces

When selecting a primer for your metal surface, consider the specific requirements of your project, such as the type of metal, exposure conditions, and desired finish.

  • For General Use: Oil-based primers are a reliable choice for most metal surfaces due to their excellent adhesion and corrosion resistance.
  • For Indoor Projects: Water-based primers are suitable for indoor metal surfaces where environmental concerns and ease of use are priorities.
  • For Bare Metal: Self-etching primers are the best option for new or bare metal surfaces, providing a strong bond and rust protection.
  • For Rusty Surfaces: Rust-inhibitive primers are perfect for metal surfaces with existing rust, as they treat and prevent further corrosion.

Cost vs. Performance Analysis

When evaluating primers, it’s essential to balance cost and performance to ensure you achieve the best results for your project.

  • Oil-Based Primers: Typically mid-range in cost, offering excellent performance and durability, making them a cost-effective choice for outdoor and industrial applications.
  • Water-Based Primers: Generally more affordable and environmentally friendly, suitable for less demanding applications where ease of use is a priority.
  • Self-Etching Primers: Slightly more expensive due to their specialized formulation, but worth the investment for bare metal surfaces requiring strong adhesion and rust protection.
  • Rust-Inhibitive Primers: Often the most expensive option, but their dual function of rust treatment and prevention can save time and money in the long run, especially for surfaces with existing rust.

By understanding the different types of primers and their respective advantages and disadvantages, you can select the best primer for your metal surface preparation, ensuring a durable and professional finish.

Frequently Asked Questions

Below are answers to some frequently asked questions:

What materials are needed to clean metal before painting?

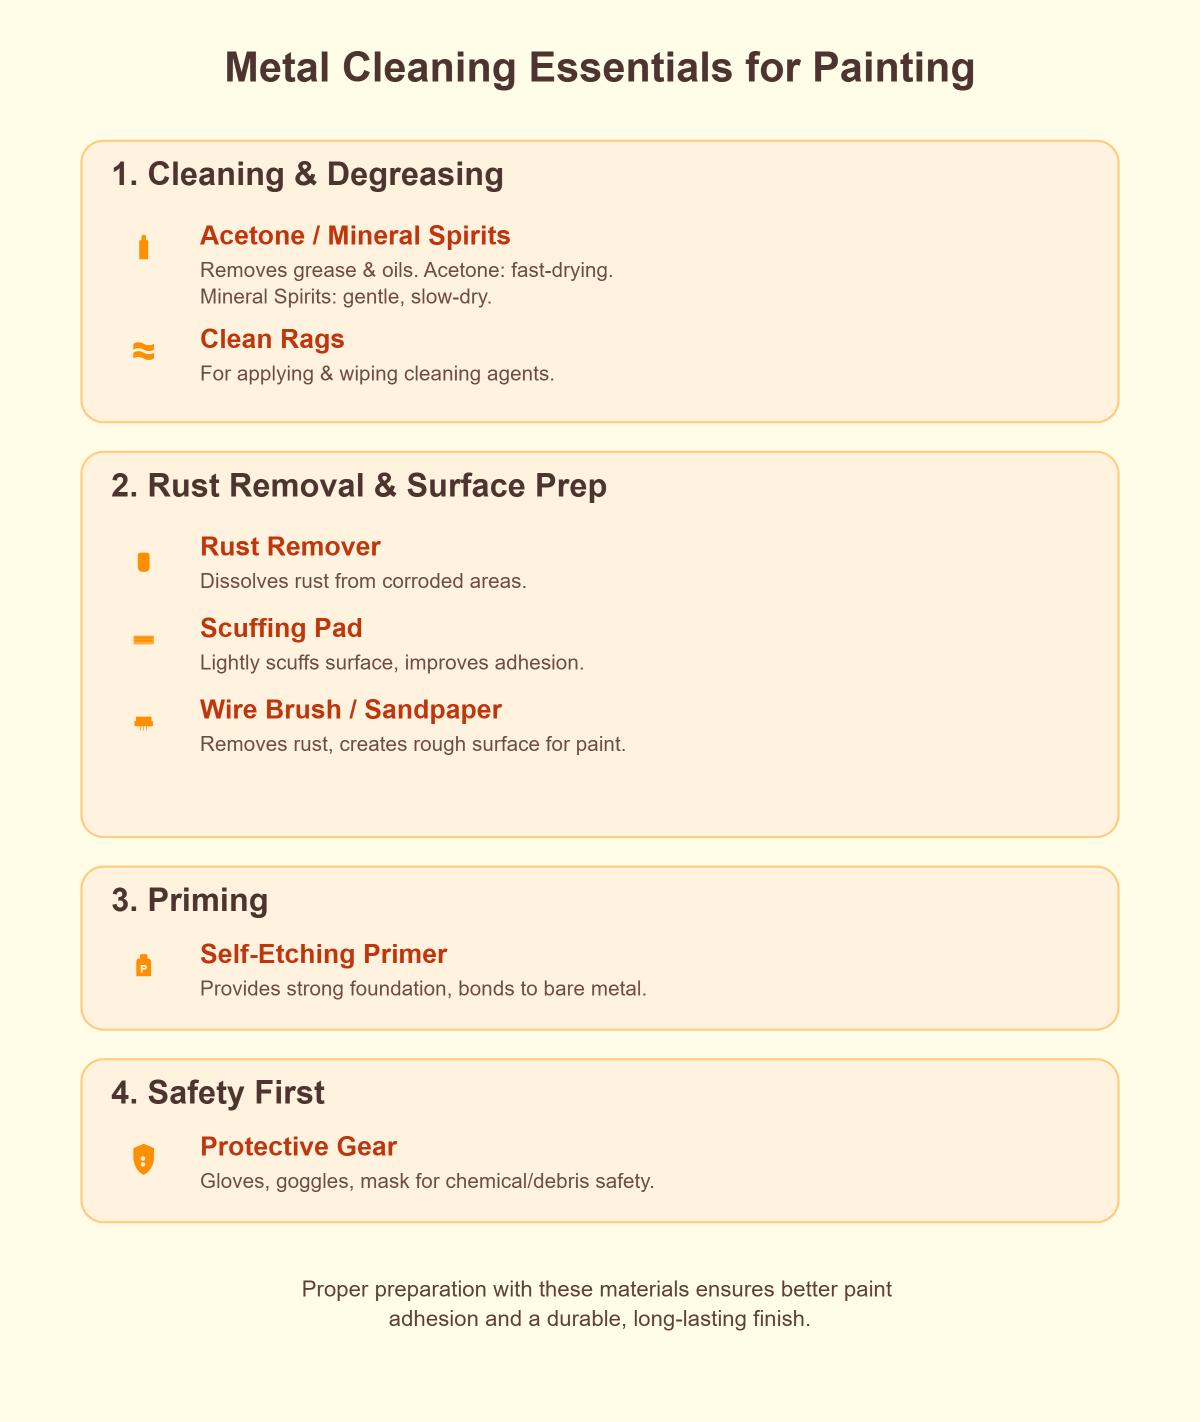
To clean metal before painting, you will need the following materials:

  • Acetone or Mineral Spirits: These cleaning agents are essential for removing grease and oils from the metal surface. Acetone dries quickly, making it suitable for situations where speed is important, while mineral spirits are gentler and slower-drying.
  • Clean Rags: Necessary for applying and wiping off the cleaning agents.
  • Rust Remover: Specifically designed chemical solutions to dissolve rust, crucial for treating corroded areas.
  • Scuffing Pad: Non-abrasive pads that lightly scuff the surface to improve primer and paint adhesion.
  • Wire Brush or Sandpaper: Used for removing rust and creating a rough surface to enhance paint adherence.
  • Self-Etching Primer: Provides a strong foundation by bonding directly to the bare metal.
  • Protective Gear: Gloves, safety goggles, and masks to protect against harsh chemicals and debris.

These materials are essential for ensuring proper preparation of the metal surface, leading to better paint adhesion and a longer-lasting finish.

How do I remove rust before painting metal?

To remove rust before painting metal, follow these steps:

  1. Remove Loose Rust: Start by scrubbing the metal surface with a wire brush to eliminate loose rust and debris. This will help expose the underlying metal.
  2. Sand the Surface: Use sandpaper to further smooth the surface and remove any remaining rust. This step also creates a rough texture that helps the paint adhere better.
  3. Clean the Surface: After sanding, wipe down the metal with a degreaser or denatured alcohol to remove any oil, grease, or residue. This ensures the surface is clean and ready for the next steps.
  4. Apply Rust Remover: For stubborn rust, apply a rust remover according to the product instructions. This chemical treatment helps dissolve rust that is deeply embedded.
  5. Use a Rust Converter (Optional): If there is still some rust remaining, you can apply a rust converter. This product chemically converts rust into a stable compound that can be painted over.
  6. Prime the Surface: Once the rust is removed and the surface is clean, apply a self-etching primer. This primer helps create a strong bond between the metal and the paint, preventing future rust.

By following these steps, you ensure that the metal surface is properly prepared, which will lead to a durable and high-quality paint finish.

Why is metal surface preparation important?

Metal surface preparation is important because it ensures that the paint adheres properly, leading to a smooth, even finish. This preparation involves cleaning the metal to remove any rust, grease, dirt, and old paint, which are common contaminants that can prevent the paint from sticking. Properly preparing the surface also helps prevent future corrosion by eliminating rust, thus enhancing the durability of the paint job. By creating a clean, stable surface, you can avoid common issues like peeling, blistering, and flaking, ensuring that the paint lasts longer and maintains its aesthetic appeal.

Can I skip using a self-etching primer?

While it is possible to skip using a self-etching primer, it is generally not recommended, especially for beginners. Self-etching primer contains acids that etch the metal surface, creating a strong bond for the paint and providing excellent adhesion. Without this primer, the paint may not adhere properly, leading to peeling or chipping. Additionally, self-etching primers offer some corrosion protection by embedding zinc particles into the metal, which helps prevent rust. Skipping this step could result in rust forming under the paint, compromising the finish over time. Therefore, for the best results and a durable, professional finish, it is advisable to use a self-etching primer as part of your metal surface preparation process.

What kind of scuffing pad should I use?

When choosing a scuffing pad for cleaning metal before painting, consider the grit level and material. For heavy oxidation or old paint removal, use a coarse pad (P150 – P320). A medium (P600) pad is good for general surface preparation, and a fine (P800 – P1200) pad is best for final prep before painting. Look for pads made with aluminum oxide abrasive or nylon fibers as they cut consistently without rusting or splintering. Popular options include Dura – Gold Scuff Pads with different grits and Scotch – Brite Scuffing Systems, known for flexibility and paint – prep effectiveness.

What safety precautions should I take when cleaning metal?

When cleaning metal before painting, it is essential to follow safety precautions to protect yourself and ensure a successful project. First, wear personal protective equipment (PPE) such as gloves to prevent skin contact with chemicals, goggles to shield your eyes from splashes and debris, and a mask to avoid inhaling dust or fumes.

Ensure your work environment is well-ventilated to dissipate harmful vapors and keep the workspace clean and clutter-free to avoid accidents. Handle chemicals like acetone in well-ventilated areas and dispose of them responsibly to minimize environmental impact.

When using tools such as wire brushes or sandpaper, operate them carefully to prevent injury. Avoid touching cleaned metal surfaces with bare hands to prevent recontamination with oils from your skin. Finally, make sure the metal surface is completely dry before applying primer or paint to avoid rust and ensure proper adhesion.

You May Also Like
We picked them just for you. Keep reading and learn more!
Get in touch
Talk To An Expert

Get in touch

Our sales engineers are readily available to answer any of your questions and provide you with a prompt quote tailored to your needs.
© Copyright - MachineMFG. All Rights Reserved.

Get in touch

You will get our reply within 24 hours.