How to Cut Copper Pipe with a Hacksaw: A Step-by-Step Guide
Are you ready to tackle your next plumbing project but unsure how to cut copper pipe with a hacksaw? Whether…
Imagine tackling a home improvement project and needing to cut a copper pipe, but all you have is a trusty Dremel tool. The good news? With the right guidance, you can achieve a clean, precise cut without damaging the pipe. Whether you’re a DIY enthusiast or a beginner looking to expand your skills, this step-by-step guide will walk you through the entire process of cutting copper pipes using a Dremel tool. From selecting the appropriate cutting bit to ensuring safety precautions and mastering advanced techniques, you’ll be equipped with all the knowledge you need. Ready to dive in and transform your project? Let’s get started!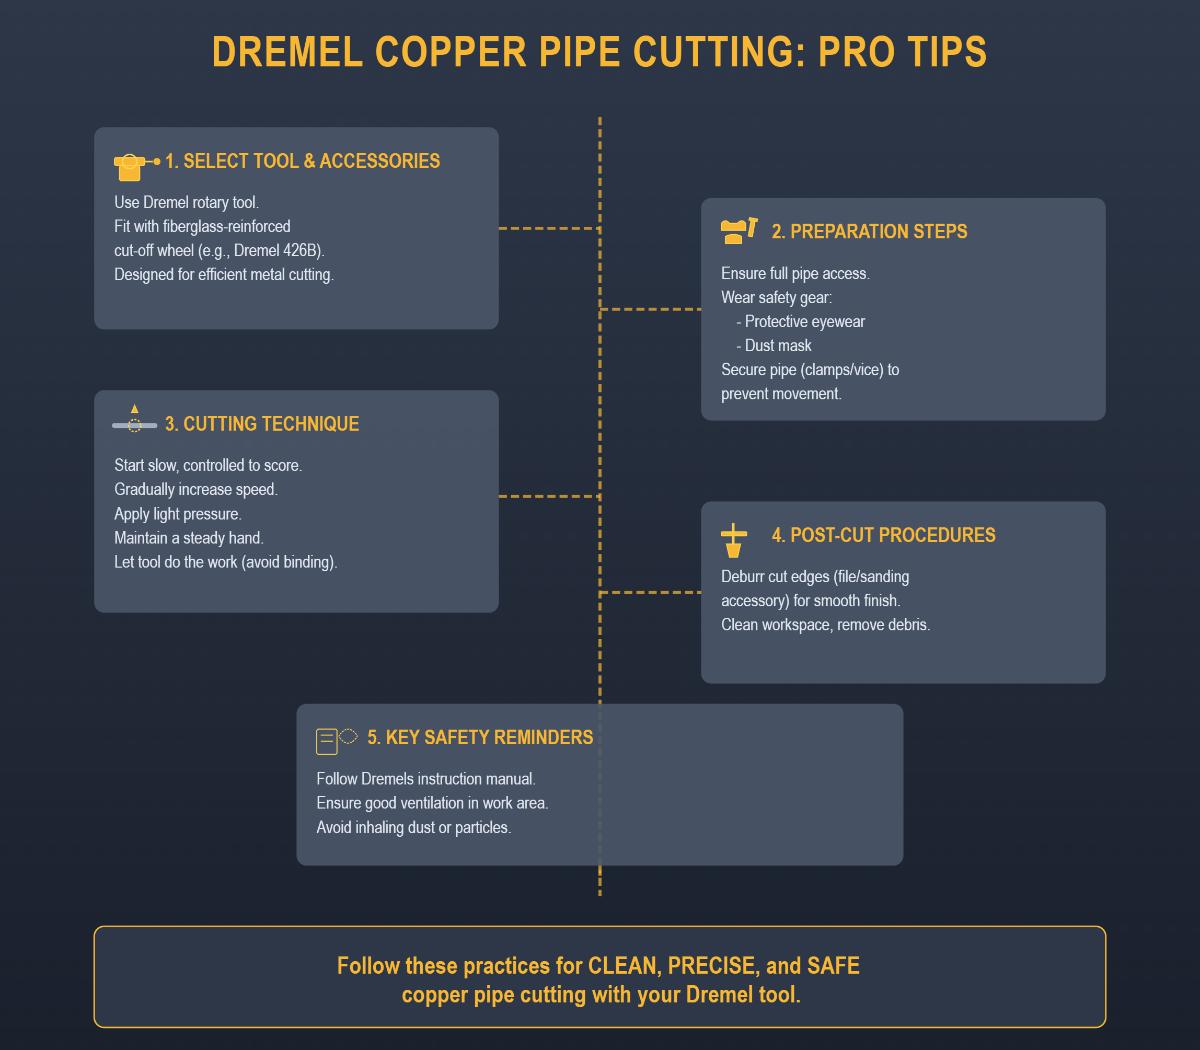
Cutting copper pipes is an essential skill for plumbing and DIY projects, as these pipes are commonly used in water supply lines due to their durability and resistance to corrosion. A Dremel tool, known for its versatility and precision, is an excellent choice for this task. It allows for clean, precise cuts, making it a favorite among DIY enthusiasts and professionals alike.
Using a Dremel tool to cut copper pipes offers several advantages:
Several tools can be used to cut copper pipes, each with its own advantages. Here are some options:
Cutting copper pipes with a Dremel tool involves several steps to ensure a clean and precise cut.
When cutting copper pipes with a Dremel tool, wearing the right personal protective equipment is crucial to ensure your safety.
Wear safety glasses to shield your eyes from flying debris and metal shavings that can cause serious injuries.
Use a dust mask or respirator to avoid inhaling harmful particles, and wear gloves to protect your hands from sharp edges and improve your grip on the Dremel tool.
If you plan to use the Dremel tool for an extended period, wearing hearing protection can prevent potential hearing damage from the tool’s noise.
A well-prepared workspace can significantly reduce the risk of accidents and enhance your efficiency.
Ensure the workspace is free from clutter. A clean and organized area minimizes tripping hazards and allows you to move freely.
Good ventilation is important to disperse dust and particles generated during cutting. Open windows or use fans to maintain airflow.
Good lighting helps you see the cut line clearly and reduces mistakes.
Securing the copper pipe firmly is critical to achieving a precise cut and preventing accidents.
Secure the copper pipe in a vice or clamp to hold it steady. This prevents the pipe from moving during cutting and ensures a clean, straight cut.
Proper handling and operation of the Dremel tool are vital for safety and effective cutting.
Hold the Dremel tool firmly with both hands if needed to maintain control and guide it accurately.
Take regular breaks to prevent both the tool and your hands from overheating. Overheating can lead to tool failure and hand fatigue, increasing the risk of accidents.
Apply gentle to moderate pressure while cutting. Excessive pressure can cause the cutting bit to bind or break, which can be dangerous.
Being prepared for emergencies can help you quickly address any issues that arise during cutting.
If the cutting bit or wheel gets stuck or binds, immediately turn off and unplug the Dremel tool. Carefully remove the bit or wheel to avoid damage and ensure your safety before restarting.
After completing the cutting process, follow these steps to ensure continued safety.
Make sure the Dremel tool and cutting wheel come to a complete stop before setting the tool down. This prevents accidental contact with the spinning wheel.
Regularly clean and maintain your Dremel tool. Proper maintenance ensures optimal performance and reduces the likelihood of malfunctions during use.
Metalworking is a crucial skill for both DIY enthusiasts and professionals, involving the shaping and manipulation of metals to create parts, structures, or tools. When cutting copper pipes with a Dremel tool, understanding the basics of metalworking can significantly improve your technique and results.
Each type of metal has distinct properties that influence how it can be worked. Copper, for instance, is a soft and malleable metal, making it relatively easy to cut and shape. Here are some common types of metals you might encounter:
The hardness of a metal determines its resistance to deformation, with softer metals like copper being easier to cut, while harder metals require more robust cutting tools and techniques.
Cutting is a primary metalworking process that involves separating a piece of metal into smaller sections. Use a metal cutting wheel on your Dremel for clean and precise cuts on copper pipes.
After cutting, filing is often necessary to smooth out rough edges and remove burrs. Using a metal file or emery cloth can help achieve a smooth finish on the cut edges of copper pipes.
Drilling involves creating holes in metal. While this is not directly related to cutting copper pipes with a Dremel, it’s a useful skill to understand for broader metalworking projects.
A versatile rotary tool that can be equipped with various attachments for cutting, grinding, sanding, and polishing. It is particularly useful for small or detailed metalworking tasks.
These tools are essential for holding the metal securely in place while you work. They help prevent movement and ensure precision.
Accurate measurements are crucial in metalworking. Tools like rulers, tape measures, and calipers help ensure your cuts and modifications are precise.
Before cutting, always mark the pipe with a pencil or marker to guide your cut. This ensures accuracy and helps you maintain a straight line.
Using both hands to hold the Dremel tool steady will greatly improve the quality of your cut. Avoid rushing the process; let the tool do the work.
While cutting, metals can heat up quickly. Although copper dissipates heat well, taking breaks to let the metal cool down can prevent overheating and maintain the integrity of both the pipe and the tool.
Selecting the appropriate cutting bit is crucial for cutting copper pipes efficiently and safely with a Dremel tool. Here are the types of cutting bits that work best for this purpose:
Metal cutting wheels, designed specifically for non-ferrous metals like copper, are highly effective for cutting copper pipes. Dremel offers various metal cutting wheels, including a 3.5-inch metal cutting wheel, which is ideal for this task.
Consider these features when choosing a cutting bit for optimal performance:
Make sure the cutting wheel is suitable for copper and other non-ferrous metals to achieve clean cuts and prevent excessive wear.
Opt for cutting wheels with an EZ SpeedClic or similar quick-change system. These systems allow for easy attachment and detachment, saving time and effort during the cutting process.
To achieve the best results and ensure safety, follow these guidelines when using the Dremel tool with the chosen cutting bit:
Set the Dremel tool to at least 15,000 RPM for smooth cuts on copper pipes. Higher speeds help maintain cutting efficiency and reduce the risk of the bit binding.
Hold the Dremel tool steadily with both hands to maintain control, ensuring accurate cuts and avoiding accidents.
Always wear protective equipment, including gloves, safety glasses, and a dust mask. This gear protects against metal shavings, dust, and other hazards associated with cutting copper pipes.
To ensure precise and clean cuts, consider these additional tips:
Clearly mark the cut line on the copper pipe with a marker or pencil. Use a straight edge to ensure the line is straight and accurate.
Align the cutting bit with the marked line and maintain steady pressure. This alignment helps avoid slipping and ensures a clean cut along the marked line.
Before starting the cutting process, ensure you have all the necessary tools and materials at hand. This preparation step is crucial for achieving a smooth and precise cut.
Proper setup of the Dremel tool ensures safety and efficiency during the cutting process.
Accurate marking is essential for a precise cut.
A stable workpiece is vital for a clean cut.
With everything set up, you can now proceed to cut the pipe.
After cutting the pipe, it’s important to smooth out any rough edges.
Proper cleanup ensures a safe and tidy workspace.
By following these step-by-step instructions, you can effectively cut copper pipes using a Dremel tool. Prioritize safety and precision throughout the process to achieve the best results.
Before beginning advanced cutting techniques, ensure your workspace is well-prepared and you have the necessary safety gear and tools.
To achieve precise cuts, securing the copper pipe properly is essential.
Selecting the appropriate cutting bit ensures efficient and safe cutting.
Implementing proper cutting techniques can enhance precision and safety.
After cutting the pipe, follow these steps to ensure a smooth finish.
Implementing these advanced tips can improve your cutting efficiency and precision.
In some cases, alternative tools might be more suitable for cutting copper pipes.
Using the wrong type of cutting bit, such as those designed for softer materials or other metals, can wear out quickly and make the cutting process inefficient. Always use metal cutting blades made for copper or similar metals to ensure durability and cleaner cuts.
Neglecting safety precautions can lead to serious injuries from copper shavings and the high-speed rotation of the tool. Always wear safety glasses to protect your eyes, gloves to shield your hands, and a dust mask to avoid inhaling fine particles created during the cutting process.
Failing to secure the copper pipe properly can result in inaccurate cuts and potential accidents, as a loose pipe may shift during cutting. Firmly clamp the copper pipe in a vice or use a strong clamp to hold it in place, ensuring stability and precision during the cutting process.
Applying too much pressure or cutting too aggressively can damage both the copper pipe and the cutting blade, leading to uneven cuts and increased wear on the tool. Use a steady, gentle motion to cut through the copper pipe, making circular cuts around the pipe to maintain control and achieve a clean, even cut.
Continuing to use a dull or worn-out cutting blade can make the cutting process more difficult and less precise, and it can also put unnecessary strain on the Dremel tool. Regularly check the condition of your cutting blade and replace it when it becomes dull or worn out to ensure efficient cutting and reduce the risk of damaging the pipe.
Copper heats up quickly during cutting, affecting the pipe’s integrity, the blade’s performance, and posing a safety hazard. Take regular breaks to allow the copper pipe and the cutting blade to cool down, maintaining the quality of the cut and ensuring the longevity of your tools.
A cluttered or poorly lit workspace can lead to accidents and mistakes. Ensure your workspace is clean, well-lit, and free of obstacles, allowing you to focus on the cutting process and reducing the risk of accidents.
Choosing the right tool for cutting copper pipes is essential for precise and clean cuts. Here are the recommended tools:
Always prioritize safety when cutting copper pipes:
Accurately marking the cut line on the copper pipe is vital for precision:
Adopting the right cutting technique is key to achieving a clean and precise cut:
After cutting, smooth the pipe edges to remove any burrs or sharpness:
Here are some extra tips to help you achieve the best results:
By following these best practices, you can effectively and safely cut copper pipes with a Dremel tool, ensuring precise and clean results for your DIY plumbing projects.
Cutting copper pipes requires specific tools to ensure clean, precise cuts. Here are some essential tools and accessories you should consider:
Manual copper pipe cutters are handheld tools specifically designed to cut copper pipes. These cutters are particularly effective for small-scale projects and DIY tasks, offering cost-effectiveness, ease of handling, and precise cuts.
Battery-operated copper pipe cutters are ideal for efficiently cutting multiple pipes or handling larger projects. These tools are powered by rechargeable batteries, allowing for quick and consistent cuts without the need for manual effort.
Rotary pipe cutters use a circular blade to encircle and cut through pipes. They are excellent for achieving precise cuts in various materials, including copper. These cutters are especially useful for professionals who require high accuracy.
Brands like Milwaukee and DeWalt offer both cordless and corded tools for cutting copper tubing. These tools provide portability and sustained power, making them versatile for various applications.
A Dremel tool equipped with metal cutting bits is a versatile option for cutting copper pipes, especially in tight or awkward spaces. The high-speed rotary action and precision of the Dremel make it an excellent choice for DIY enthusiasts.
To achieve the best results when cutting copper pipes, consider these additional accessories:
After cutting the pipe, it’s essential to smooth out the cut ends to ensure they fit well into fittings. Deburring and chamfering tools are specifically designed for this purpose.
Securing the copper pipe firmly during cutting is crucial for safety and precision. Clamps and vices hold the pipe steady, preventing movement that could lead to inaccurate cuts or accidents.
Accurate measurements and clear markings are essential for precise cuts; use measuring tapes, rulers, and markers to ensure an accurate and easy-to-follow cut line.
One common issue when using a Dremel tool to cut copper pipes is the rapid wear of cutting blades. If you notice that the blade is wearing out too quickly, ensure you are using a metal cutting blade specifically designed for copper and other non-ferrous metals. Blades meant for softer materials will wear down faster and may not provide a clean cut.
Check Blade Compatibility: Verify that the blade is suitable for cutting metal, particularly copper.
Adjust Cutting Speed: Set the Dremel tool to an appropriate speed, typically moderate to high, to avoid excessive blade wear.
Replace Worn Blades: Regularly inspect the blade for wear and replace it as needed to maintain cutting efficiency and safety.
Inaccurate cuts can occur if the copper pipe is not securely clamped or if the Dremel tool is not held steadily. This can result in uneven or jagged edges, which may require additional finishing.
Secure the Pipe: Secure the copper pipe with a vice or clamp to prevent movement while cutting.
Maintain Steady Hands: Hold the Dremel tool with both hands to ensure stability and control throughout the cutting process.
Mark the Cut Clearly: Use a marker to draw a precise line where the cut is needed, and follow this line carefully while cutting.
Movement of the pipe during cutting can cause misalignment and uneven cuts. Ensuring the pipe is securely fastened is crucial for achieving a clean and accurate cut.
Tighten the Clamp: Ensure the clamp or vice is tight enough to hold the pipe securely without causing any damage.
Recheck Stability: Before starting the cut, double-check that the pipe is stable and will not shift under the pressure of the cutting tool.
Overheating can be a problem for both the cutting blade and the copper pipe, potentially causing damage to the pipe and reducing the lifespan of the blade.
Take Breaks: Allow the Dremel tool and the copper pipe to cool down periodically during the cutting process.
Monitor Tool Temperature: If the tool becomes uncomfortably hot, take a break to let it cool down.
Use Moderate Speed: Adjust the Dremel tool to a moderate speed setting to prevent excessive heat buildup.
After cutting, the edges of the copper pipe may have burrs or rough spots that need to be smoothed out to ensure a proper fit and finish.
Smooth the Edges: Smooth the cut ends with a metal file or sandpaper to remove rough edges and burrs.
Deburring Tool: Consider using a deburring tool designed to remove burrs from the inside and outside edges of the pipe.
A binding or stuck blade can be hazardous and may damage the pipe or the tool. This issue often arises from applying too much pressure or cutting at an incorrect angle.
Use Light Pressure: Apply gentle, consistent pressure when cutting to avoid binding the blade.
Correct Angle: Ensure the Dremel tool is held at the correct angle, typically perpendicular to the pipe, to prevent the blade from getting stuck.
Stop and Adjust: If the blade binds, stop cutting, turn off the tool, and carefully adjust the pipe or tool position before resuming.
Uneven cuts can result from an unstable workpiece or inconsistent cutting technique, leading to additional work to correct the issue.
Re-secure the Pipe: Ensure the pipe is securely clamped and stable before starting the cut.
Consistent Technique: Maintain a steady hand and consistent pressure throughout the cutting process to achieve a uniform cut.
Practice: Practice cutting on scrap pieces of copper pipe to improve technique and confidence before working on the final piece.
Below are answers to some frequently asked questions:
When cutting copper pipes with a Dremel tool, follow these best practices to ensure safety and precision:
By adhering to these practices, you can achieve clean and precise cuts on copper pipes while maintaining safety.
To avoid damaging the copper pipe while using a Dremel, follow these steps:
By following these guidelines, you can effectively cut copper pipes with a Dremel while minimizing the risk of damage.
For cutting copper pipes with a Dremel tool, you should use a high-speed metal cutting bit. These bits are specifically designed to handle the hardness of copper and ensure a precise cut. When choosing a cutting bit, look for ones labeled for metal or specifically for use with copper. Dremel’s cutting bits, such as the EZ456 Metal Cutting Wheel or the 426 Fiberglass Reinforced Cut-off Wheels, are excellent choices for this task. These bits allow for clean cuts and can easily navigate tight spaces where other tools might not fit, making them ideal for DIY projects involving copper pipes.
To ensure a smooth cut on a copper pipe using a Dremel tool, follow these steps:
By following these steps and using the appropriate tools, you can achieve a smooth and precise cut on a copper pipe with a Dremel tool.
When cutting copper pipes with a Dremel tool, additional tools can enhance safety and precision. Alongside the Dremel tool and appropriate metal cutting blades, you should use a clamp or vice to secure the copper pipe firmly. This prevents movement during cutting, ensuring a cleaner cut and reducing the risk of accidents. Safety equipment such as gloves and safety glasses are essential to protect against debris and shavings. A marking tool, like a marker or scratch awl, is also necessary to clearly define the cut line on the pipe. Optionally, a file or sandpaper can be used to smooth the edges after cutting, removing any burrs for a clean finish.
When cutting copper pipes with a Dremel tool, it’s crucial to follow essential safety precautions to avoid accidents and ensure a successful outcome. First, always wear protective gear such as safety glasses or goggles to protect your eyes from flying metal shavings, gloves to shield your hands and improve grip, and a dust mask to prevent inhaling metal dust. Prepare your workspace by ensuring it is clutter-free and well-ventilated, with good air circulation to disperse dust. Secure the copper pipe firmly in a vice or clamp to prevent movement during cutting. Handle the Dremel tool with a steady hand, using slow and controlled movements along the marked line, and apply gentle pressure to avoid slipping or breaking the cutting bit. Take regular breaks to prevent overheating and hand fatigue. If the cutting bit becomes stuck, turn off and unplug the tool before attempting to free it. Lastly, avoid contact with hidden wiring to prevent electrical shock and inspect the workpiece for any foreign objects that could cause accidents. Following these precautions will help ensure a safe and precise cutting process.

