How to Spot Weld with a MIG Welder: A Step-by-Step Guide
Imagine creating flawless, strong welds that hold your metal projects together seamlessly. If you’re an intermediate welder looking to master…
Imagine transforming a robust piece of thick steel into a seamless, solid structure through the art of MIG welding. Whether you’re an experienced welder looking to refine your skills or an intermediate enthusiast eager to tackle more challenging projects, mastering the techniques for MIG welding thick steel can elevate your craft to new heights. This comprehensive guide delves into the essential methods and settings required to achieve full penetration, ensuring your welds are strong and reliable. From selecting the right shielding gas to fine-tuning your welding machine, we cover everything you need to know to perfect your approach. Ready to conquer the complexities of welding thick steel? Let’s dive in and explore the secrets behind achieving flawless welds.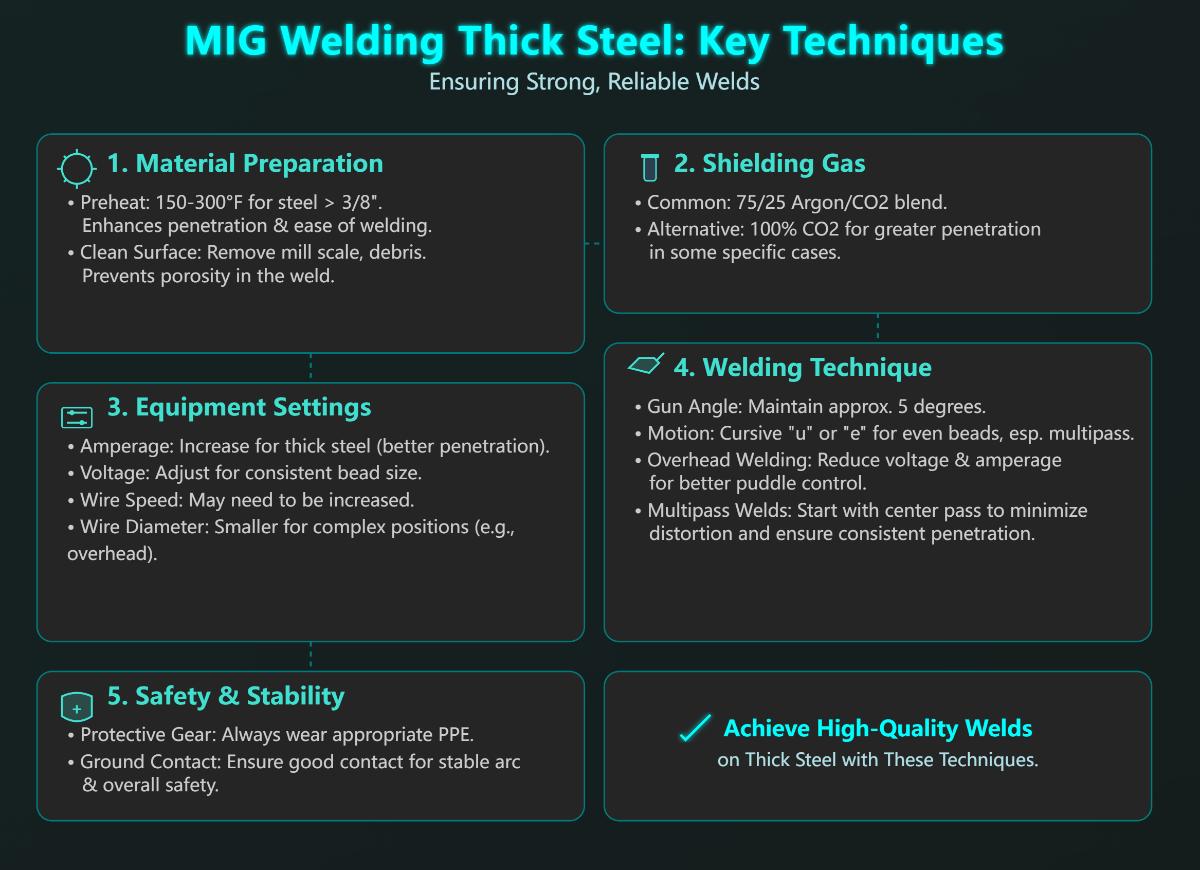
MIG welding, also known as Gas Metal Arc Welding (GMAW), is widely used in various industries because of its flexibility and efficiency. This technique involves feeding a continuous solid wire electrode through a welding gun and into the weld pool, joining the base materials together. A shielding gas, typically a mixture of argon and carbon dioxide, is used to protect the weld pool from contamination by the surrounding atmosphere.
Thick steel is essential in industries like construction, shipbuilding, and heavy equipment manufacturing due to its strength and durability, but welding it requires specialized techniques and equipment.
Understanding the following key concepts and terminology is essential for mastering MIG welding of thick steel:
Choosing the right equipment and setting it up correctly is crucial for successful MIG welding of thick steel:
Employing the right techniques is essential for achieving high-quality welds on thick steel:
Always wear protective gear, including a welding helmet, gloves, and safety glasses. Ensure proper ventilation to avoid inhaling harmful fumes, and maintain good electrical ground contact to prevent electrical shock hazards.
Understanding steel thickness is crucial for mastering MIG welding, especially when dealing with thick steel. The thickness of steel impacts the welding process, equipment settings, and techniques required to achieve strong, defect-free welds. Steel can generally be categorized into three thickness ranges: thin, medium, and thick steel.
Thin steel, commonly found in sheet metal applications, poses unique challenges for MIG welding. The main objective is to prevent burn-through and achieve a clean, strong weld. This can be accomplished by:
Medium thickness steel is more forgiving than thin steel but still requires careful attention to welding settings, typically handled by a .030-inch diameter wire, such as ER70S-6. Key considerations include:
Welding thick steel presents significant challenges due to the need for greater penetration and heat input. Here are some guidelines for welding thick steel:
Steel thickness directly influences the welding techniques and settings used. Recognizing these effects is essential for producing high-quality welds:
Each steel thickness presents unique challenges that must be addressed to ensure successful welds:
Safety should always be the top priority before beginning any welding process. Ensure you have the following safety gear and measures in place:
To successfully MIG weld thick steel, gather the essential tools and materials:
Preheating is a crucial step when welding thick steel to reduce thermal stress and improve weld penetration. It minimizes the risk of cracking and ensures a uniform weld.
For thick steel, using a .045-inch wire is recommended for better penetration and weld strength.
When welding thick steel, a single pass may not be sufficient to achieve full penetration.
After welding, carefully inspect the weld for defects like porosity, lack of fusion, or burn-through. Address any issues to ensure the weld meets quality standards.
Choosing the right shielding gas is crucial for high-quality MIG welds, especially with thick steel. Here are the primary types of shielding gases commonly used:
Choosing the right shielding gas depends on several factors including material thickness, desired weld properties, and cost considerations.
Shielding gases support different transfer modes in MIG welding, which is important for thick steel:
The chosen shielding gas impacts the overall quality of the weld. Here are some key effects:
Maintaining the correct flow rate of shielding gas is critical to protect the weld pool from atmospheric contamination and ensure a high-quality weld.
For MIG welding thick steel, maintain a shielding gas flow rate of 15 to 30 cubic feet per hour (CFH), adjusting based on the environment to ensure proper shielding.
The thickness of the material greatly affects the amount of amperage needed for welding. A general rule of thumb is to use approximately 1 amp of output per 0.001 inches of steel thickness. For example, welding a 0.25-inch (6.35 mm) thick steel plate requires around 250 amps, which ensures proper penetration and a strong weld.
Choosing the right wire size is essential for effective MIG welding of thick steel. Common wire diameters for thicker materials range from 0.8 mm to 1.2 mm. Using the correct wire size helps avoid frequent changes and ensures consistent weld quality. For thicker steel, a wire diameter of 0.045 inches is typically recommended.
Voltage settings influence the width and height of the weld bead. Higher voltage produces wider, flatter beads, while lower voltage results in narrower, ropier beads. For thick steel, voltage settings generally range from 22 to 28 volts. Adjusting voltage according to the steel thickness and desired bead profile is essential for optimal welding outcomes.
Wire feed speed should be matched to the amperage to maintain a smooth arc. A higher wire feed speed corresponds to higher amperage. For thick steel, starting with a wire feed speed of approximately 300-400 inches per minute is a good reference point. Adjusting the wire feed speed ensures arc stability and quality welds.
The type and flow rate of shielding gas greatly impact the quality of the weld. Commonly used gases include CO2 or a mix of Argon and CO2. Ensuring proper gas flow is crucial to prevent porosity and achieve clean welds. Typical flow rates range from 15-25 cubic feet per hour (CFH) for CO2 or Argon/CO2 mixtures.
Accurately measure the steel thickness to decide on the necessary amperage and wire size. This step ensures proper penetration and weld strength.
Choose a wire size suitable for the steel thickness being welded. For thick steel, a wire diameter of 0.045 inches is often recommended.
Begin with a voltage setting within the range suitable for thick steel, typically 22-28 volts. Adjust the voltage based on the desired bead profile and penetration.
Set the wire feed speed to match the selected amperage for a stable arc. A starting point of 300-400 inches per minute is recommended for thick steel.
Use the appropriate shielding gas and ensure proper flow rates. For thick steel, a mixture of 75% Argon and 25% CO2 is commonly used. Maintain a flow rate of around 15-25 CFH.
Always test your welding settings on scrap metal before welding actual parts. This practice helps fine-tune the settings and ensures optimal weld quality.
The sound of the arc can indicate if adjustments are needed. A smooth, consistent sound suggests proper settings, while irregular sounds may require parameter adjustments.
Document successful settings for future reference. Keeping a record ensures consistency in weld quality and simplifies setup for similar projects.
Porosity or lack of penetration can compromise weld strength. To address these issues:
Undercut or burn-through can weaken the weld. Solutions include:
By following these guidelines and adjusting MIG welding settings based on steel thickness and desired weld characteristics, high-quality, strong welds can be achieved consistently.
Thorough preparation is essential for achieving full penetration in MIG welding thick steel. Proper cleaning and preheating of the base material are critical steps.
Remove contaminants by using a wire brush or grinder to clean the steel surface, eliminating mill scale, rust, oil, and other impurities to ensure better fusion and reduce the likelihood of weld defects. Inspect the steel for any cracks or imperfections that could affect weld quality, and address any issues before proceeding.
Preheating the steel helps prevent cracking and improves weld penetration by ensuring the metal is ready to receive the weld. Use an oxy-acetylene torch to evenly heat the area to be welded. You can also use electric heating elements and monitor the temperature with an infrared thermometer. For steel thicker than 3/8 inch (about 9.5 mm), preheat to 150–300°F (65–150°C).
Selecting the correct wire diameter, feed speed, amperage, and voltage settings is crucial for full penetration in MIG welding thick steel.
Use larger diameter wires, such as 0.035″ or 0.045″, to deliver more filler metal and heat. Adjust the wire feed speed according to the material thickness and wire size. Higher wire speeds are generally needed for thicker materials.
Set your MIG welder to higher amperage for thick steel to ensure sufficient heat input for full penetration. Monitor and adjust the voltage settings to achieve a stable arc and optimal penetration. Higher voltage settings are typically required for thicker steel.
Using the right welding techniques is crucial for achieving full penetration. Here are some effective methods:
For steel thicker than 1/4 inch (6 mm), use the “vertical up” technique. This method ensures strong penetration by allowing gravity to help the molten metal fill the joint.
Apply multiple passes starting with a root pass to establish penetration, followed by filler and cover passes. This builds up the weld and ensures full joint fusion.
Hold the MIG gun at a slight (5–15°) push angle for better control and penetration. Use a cursive “u” or “e” weaving motion to evenly distribute heat and filler metal across the joint.
Keep the wire stick-out short (about 1/4–3/8 inch or 6–10 mm) to maintain a stable arc and prevent excessive spatter or irregular penetration.
Move at a steady, moderate speed. Moving too slowly can cause excessive heat buildup and burn-through, while moving too quickly can result in lack of penetration. Adjust travel speed and heat input as needed to maintain a consistent, full-penetration weld bead.
Addressing common defects is essential to ensure high-quality welds with full penetration.
Excessive heat or slow travel speed can cause burn-through. Lower the voltage and wire feed speed, and increase travel speed to prevent holes in the weld.
Occurs when the weld does not fully fuse into the joint. Ensure proper heat input, correct joint preparation, and use the vertical up or multipass technique to achieve full penetration.
Uneven heating and cooling can cause warping and distortion. Use skip-welding or step-welding techniques to spread out heat and minimize warping on large or thick sections.
Recognizing good fusion and proper machine settings comes with experience. If you are not confident in your MIG skills, consider using Stick or TIG welding for thicker materials until you gain more expertise. Always wear appropriate protective equipment, including a welding helmet, gloves, and flame-resistant clothing. Ensure a solid ground connection to maintain arc stability and weld quality.
Burn-through usually happens because of too much heat or welding too slowly, causing the weld metal to penetrate completely through the base material and create holes.
Solutions:
Lack of penetration occurs when the weld bead does not fully penetrate the joint, compromising the weld’s strength and integrity.
Solutions:
Issues like bird-nesting (where the wire tangles) or burn-back (where the wire melts back into the contact tip) can disrupt the welding process.
Solutions:
Inadequate shielding gas can lead to weld porosity and contamination, affecting weld quality.
Solutions:
Overheating can cause warping, especially in thinner sections of steel or when excessive heat is applied.
Solutions:
Warping occurs due to uneven heating and cooling during the welding process, leading to distortions in the steel.
Solutions:
Achieving full penetration in thick steel requires careful management of welding parameters and techniques.
Solutions:
Porosity can occur due to contamination or inadequate shielding gas coverage, leading to weak welds.
Solutions:
Undercut is a groove that forms at the weld toe, weakening the weld joint.
Solutions:
MIG welding, also known as Gas Metal Arc Welding (GMAW), has several limitations when applied to thick steel. The primary issue is penetration challenges.
Short-arc MIG welding, which uses lower voltage and amperage, often fails to penetrate thick steel deeply. When welding plates that are 3/8″ or thicker, the large heat sink of the material rapidly dissipates heat, causing the weld puddle to cool quickly. This results in shallow root penetration and potential weak joints as the weld may bridge across the joint rather than fully fuse at the root.
Spray-arc MIG welding, operating at higher voltage and amperage, can achieve deeper penetration and higher deposition rates. However, this mode is not always achievable with standard MIG machines, especially those under 200 amps. To weld thick steel effectively, a machine with spray-arc capability is often necessary.
The welding machine’s capacity is crucial. As a general rule, the welder should provide approximately 1 amp for every 0.001″ of material thickness. For instance, a 180-amp machine is typically limited to welding up to 3/16″ steel in a single pass. Welding thicker materials requires multiple passes, which can introduce complexity and increase the risk of defects.
Using thinner wire, such as 0.023″ or 0.030″, on thick steel further limits penetration and deposition rates. This can lead to cold welds and insufficient fusion unless multiple passes are employed. For thicker steel, larger diameter wires like 0.035″ or 0.045″ are more suitable as they provide better penetration and higher deposition rates.
While welding thick steel often requires multiple passes, this approach is labor-intensive and increases the risk of defects such as slag inclusions, incomplete fusion, and distortion. Proper technique and inspection are crucial to mitigate these risks.
Fillet welds on thick steel are particularly challenging because they cannot be ground for penetration. This limits the effective thickness that can be welded with a given machine and requires careful control of welding parameters to ensure proper fusion.
Welding thick steel with a small MIG machine often means prolonged heat input, leading to warping, distortion, and undesirable changes in the base metal’s properties. Managing heat input is essential to prevent these issues.
To minimize the negative effects of excessive heat, proper joint preparation, preheating, and controlled interpass temperature are essential. These measures add complexity to the welding process but are necessary for achieving high-quality welds on thick steel.
Below are answers to some frequently asked questions:
Mastering MIG welding thick steel involves several essential techniques to ensure strong, reliable welds. Begin with proper material preparation, including preheating the steel to between 150°F to 300°F to enhance penetration and ease of welding, particularly for steel thicker than 3/8 of an inch. Clean the surface thoroughly to remove mill scale and debris, which can cause porosity.
Selecting the right shielding gas is crucial. A 75/25 argon/CO2 blend is common, but 100% CO2 can offer greater penetration in some cases. Adjust equipment settings by increasing amperage for thicker steel to improve penetration and tweaking voltage to maintain a consistent bead size. Higher wire speed may be necessary, and using a smaller wire diameter can be advantageous for complex positions like overhead welding.
Maintain a slight gun angle, around 5 degrees, and use a cursive “u” or “e” motion for even beads, especially in multipass welds. For overhead welding, reduce voltage and amperage for better control over the weld puddle. Begin multipass welds with a center pass to minimize distortion and ensure consistent penetration.
Always wear protective gear and ensure good ground contact for stable arc performance and safety. By adhering to these techniques, you can achieve high-quality welds on thick steel using the MIG welding process.
To achieve full penetration when MIG welding thick steel, several critical techniques and considerations must be applied. Firstly, preheat the steel to around 150°F to 300°F to enhance penetration, ensuring the metal is hot and ready for welding. Additionally, clean the steel surface by removing mill scale for a smooth and clean weld.
Selecting the right shielding gas is essential. A 75/25 argon-CO2 mix is commonly recommended as it provides good penetration and stability. Alternatively, 100% CO2 can be used for hotter burns, though it requires more skill to manage.
Employing the vertical up welding technique is beneficial for thicker materials, typically 1/4 inch or more, starting at the bottom of the joint and welding upwards. Maintain a slight gun angle (5 to 15 degrees) and use a weaving motion to control the weld puddle size and shape.
Adjust your equipment settings appropriately. Using a smaller wire diameter can enhance manageability and control. Reducing voltage and amperage helps maintain a smaller, controllable weld puddle, especially for overhead welding.
Control your travel speed based on the joint thickness and weld puddle size. A faster speed prevents the weld metal from falling out, especially in overhead positions. Keep the arc on the leading edge of the puddle to prevent the molten metal from getting ahead.
For thicker materials, multipass welding may be necessary. Start with a center pass and add additional passes to ensure full penetration without overheating the material. By following these guidelines, effective and reliable welds with full penetration can be achieved on thick steel using MIG welding.
For MIG welding thick steel, recommended settings vary based on the steel’s thickness and the wire size used. Generally, you should use 1 amp per 0.001 inch of steel thickness. For instance, 0.125-inch thick steel requires approximately 125 amps. Wire size is crucial; typically, 0.035-inch or 0.045-inch wire is used for thick steel. The corresponding amperage ranges are 50–180 amps for 0.035-inch wire and 75–250 amps for 0.045-inch wire.
Set the voltage to control the arc length and bead profile. Start with around 18 volts for 0.035-inch wire and adjust incrementally for stability. Wire feed speed should match the amperage and voltage, starting around 260 inches per minute (ipm) for 0.035-inch wire.
For shielding gas, a 75% argon / 25% CO2 mix is commonly used, though 100% CO2 can provide deeper penetration. Always test settings on scrap metal first to ensure optimal results.
Preheating is essential when welding thick steel to ensure the quality and integrity of the weld. Thick steel acts as a significant heat sink, which can lead to rapid cooling and contraction after welding, increasing the risk of thermal stress and cracking. By preheating the steel, the cooling rate is slowed, reducing these stresses and the likelihood of cracking in both the weld and the surrounding material.
Additionally, preheating improves ductility and reduces hardness in the heat-affected zone (HAZ), which is particularly important for high-carbon steel and cast iron, as these materials can become brittle if cooled too quickly. Preheating also enhances weld penetration by starting the base material at an elevated temperature, thereby reducing the energy needed to achieve optimal fusion. Furthermore, it minimizes hydrogen-induced cracking by allowing more time for hydrogen to escape during the cooling process.
For MIG welding thick steel, the best shielding gas is a mixture of 75% argon and 25% carbon dioxide (C25). This combination offers an optimal balance of penetration, arc stability, and weld fluidity. The argon creates an inert environment that reduces oxidation, while the carbon dioxide enhances arc stability and helps burn off surface contaminants. This mixture is highly effective for achieving high-quality welds on thick steel, making it the preferred choice for both industrial applications and advanced hobbyist projects. Avoid using 100% carbon dioxide (C100) as it can result in an erratic arc and increased spatter, which are not ideal for thick steel welding.
MIG welding, or Gas Metal Arc Welding (GMAW), is a versatile and efficient process, but it has specific limitations when dealing with thick steel. One significant challenge is achieving adequate penetration depth. The rapid cooling effect of thick steel can quench the molten weld puddle too quickly, preventing full root penetration. Additionally, thick steel requires higher heat input for proper fusion, which may exceed the capabilities of smaller MIG welders, leading to risks of insufficient penetration or burn-through.
Wire size and type also play a crucial role; thicker wires can handle higher currents and deposit more metal, making them more suitable for thick materials. Multiple passes are often necessary to build up the weld in layers, but this method requires precise control to avoid issues like overheating.
For very thick steel, using processes like Spray Arc MIG can offer better penetration, though not all MIG welders are capable of supporting the higher current and voltage settings required. Overall, careful planning, equipment selection, and technique optimization are essential to mitigate these limitations and achieve high-quality welds on thick steel.

