Seasonal Sale! Enjoy 10% off on all machines, Request FREE Quote!

How to Polish Polycarbonate: Techniques and Best Practices

Polycarbonate, a versatile and durable material used in everything from optical lenses to laboratory equipment, often requires polishing to maintain its clarity and aesthetic appeal. But how do you polish polycarbonate effectively, and what are the best practices to ensure a flawless finish? Whether you’re dealing with minor scratches or seeking to restore a pristine surface, mastering the art of polycarbonate polishing is essential. In this comprehensive guide, we will walk you through the most effective techniques and best practices, from preparation and safety measures to detailed step-by-step polishing methods. Ready to transform your polycarbonate items? Let’s dive into the essential techniques and discover the secrets to achieving a perfect polish.

How to Polish Polycarbonate Techniques and Best Practices

Introduction to Polycarbonate

Polycarbonate

Polycarbonate is a strong and versatile plastic known for its excellent impact resistance, transparency, and lightweight nature. Polycarbonate is widely used in various industries due to its unique mechanical and optical properties, such as in optical lenses, windshields, laboratory equipment, and protective gear.

Common Applications of Polycarbonate

  • Optical Lenses: Due to its high transparency and impact resistance, polycarbonate is ideal for manufacturing eyewear lenses, camera lenses, and other optical components.
  • Windshields: In the automotive and aerospace industries, polycarbonate is often used for windshields and windows because it provides excellent visibility and can withstand significant impact without shattering.
  • Laboratory Equipment: Its durability and heat resistance make polycarbonate ideal for laboratory instruments and containers, ensuring they last long and perform well.
  • Protective Gear: Helmets, face shields, and other protective equipment often incorporate polycarbonate for its strength and lightweight nature, providing safety without compromising comfort.

Importance of Proper Polishing for Polycarbonate

Polishing polycarbonate is crucial to maintain and enhance its optical clarity and durability.

  • Restore Clarity: Polishing removes surface imperfections, restoring the material’s original transparency and ensuring clear vision through lenses and windshields.
  • Improve Aesthetic Appeal: Polishing makes polycarbonate surfaces look more professional and attractive, which is essential for consumer products and displays.
  • Extend Lifespan and Enhance Performance: Regular polishing not only extends the lifespan of polycarbonate products by preventing deeper damage but also ensures that items like optical lenses and laboratory equipment perform accurately and reliably.

Preparation Before Polishing

Cleaning the Polycarbonate Surface

Begin by thoroughly cleaning the polycarbonate surface to ensure the best polishing results. Use a mild soap solution and a soft cloth to gently remove any dirt, dust, and debris, ensuring no contaminants cause an uneven finish.

Inspecting for Scratches and Imperfections

After cleaning, inspect the polycarbonate surface for any scratches, gouges, or imperfections. Identifying these areas early will help you decide on the appropriate polishing method and prepare the surface accordingly. For minor scratches, you may proceed directly to polishing, but deeper scratches will require more intensive preparation, such as sanding.

Safety Precautions and Required Safety Gear

Safety is crucial when polishing polycarbonate. Ensure you have the following safety gear:

  • Protective Gloves: To protect your hands from chemicals and abrasive materials.
  • Safety Goggles: To shield your eyes from particles and chemical splashes.
  • Respirator Mask: Particularly important if you’re using chemical or vapor polishing methods to avoid inhaling harmful fumes.
  • Protective Clothing: Wear long sleeves and an apron to protect your skin from potential splashes and abrasions.

Selecting the Right Polishing Method for Your Project

The method you choose for polishing polycarbonate depends on the type of scratches and the desired finish. Here are some common methods:

  • Vapor Polishing: Ideal for achieving high transparency. It involves using chemical vapors to melt and smooth the surface.
  • Mechanical Polishing: Involves wet sanding followed by buffing with a polishing compound, suitable for removing fine scratches and achieving a glossy finish.
  • Steam Polishing: Uses high-temperature steam to soften and smooth the surface, often used for intricate shapes and geometries.

Sanding and Surface Preparation

For surfaces with significant scratches, follow these wet sanding steps:

  1. Start with coarse-grit sandpaper (200-400 grit) to smooth out the surface.
  2. Progress to finer grits (800-2500) for a smooth finish, keeping the surface wet to prevent overheating.
  3. Clean the surface with a damp cloth to remove sanding debris.

Final Preparation

Ensure you have all the necessary supplies before you start polishing: microfiber cloths for applying and buffing compounds, mild soap and water for cleaning, the right polishing compounds for your method, and any specific tools or equipment needed for your technique.

Polishing Techniques for Polycarbonate

There are several techniques for polishing polycarbonate, each suited to different scratch types and finish goals. Here’s an overview of the primary methods:

Sanding and Buffing

Sanding and buffing is a mechanical polishing technique that involves using progressively finer grit sandpaper to remove scratches and smooth the surface.

  1. Initial Sanding: Start with coarse grit sandpaper (around 200 grit) to remove deeper scratches.
  2. Progressive Sanding: Move to finer grits (400, 800, 1000, up to 2500) to smooth the surface further. Always keep the surface wet to reduce friction and prevent overheating.
  3. Buffing: Use a soft polishing disc and a suitable polishing compound to buff the surface to a high gloss.

Vapor Polishing (Solvent Polishing)

Vapor polishing uses chemical vapors to melt the surface of polycarbonate, creating a smooth and clear finish.

  1. Preparation: Place the polycarbonate piece in a controlled environment to contain the chemical vapors.
  2. Application: Use a solvent like Weld-ON 4. The vapor causes the surface to melt slightly, filling in scratches.
  3. Solidification: Allow the material to solidify into a smooth finish.

Chemical Polishing

Chemical polishing uses a solution to dissolve a thin layer of polycarbonate, smoothing out any imperfections.

  1. Preparation: Clean the surface thoroughly.
  2. Application: Apply a chemical polish such as methylene chloride evenly over the surface.
  3. Finishing: Allow the chemical to dissolve the surface layer, then rinse and dry the polycarbonate.

Flame Polishing

Flame polishing uses a controlled flame to melt the surface of polycarbonate, resulting in a clear, glossy finish.

  1. Clean the edges or surface to be polished.
  2. Use a propane or hydrogen torch to quickly and carefully apply a flame, which will slightly melt the polycarbonate.
  3. Allow the polycarbonate to cool naturally for a smooth finish.

Wet Sanding

Wet sanding is similar to dry sanding but uses water to reduce friction and prevent additional scratches.

  1. Start with coarse grit sandpaper (200-400 grit) while keeping the surface wet.
  2. Progress to finer grits (800-2500), ensuring the surface remains wet for a smooth finish.
  3. Finish by buffing to enhance clarity and shine.

Tools and Equipment Needed

  • Various grits of sandpaper (200 to 2500)
  • Polishing compounds for polycarbonate
  • Soft polishing discs
  • Solvents for vapor and chemical polishing
  • A propane or hydrogen torch
  • Protective gear like gloves, goggles, and a respirator mask

Vapor Polishing

Vapor Polishing Polycarbonate

Vapor polishing is a specialized technique used to enhance the surface finish of polycarbonate by utilizing solvent vapors. This method effectively reduces surface roughness and improves transparency, making it ideal for applications requiring high optical clarity, such as optical lenses, windshields, and laboratory equipment.

Preparation

Set up a controlled, well-ventilated workspace to safely handle solvent vapors. A fume hood or an area with an exhaust system is recommended. Wear appropriate protective gear, including positive-air-pressure respirators, safety goggles, gloves, and protective clothing to guard against chemical exposure. Use a suitable solvent for polycarbonate, such as Weldon 4 or a mixture of methylene chloride and tetrahydrofuran.

Manual Polishing

Before vapor polishing, manually polish the surface using fine grit sandpaper (e.g., 200 and 400 grit) to remove major imperfections. Then, thoroughly clean the workpiece with soap and water to remove any dust, debris, or residues from sanding, and dry the piece completely.

Vapor Polishing Process

Heat the solvent in a suitable container until it vaporizes. Carefully direct the vapor onto the polycarbonate surface for even exposure. The vapor will soften the plastic, filling in microscopic scratches. Once the vapor is removed, the material solidifies, resulting in a smoother finish.

Post-Polishing

Rinse the polished part with clean water to remove any residual solvent, then allow it to air dry in a well-ventilated area before handling.

Best Practices

Maintain a consistent distance and movement when applying the vapor to ensure uniform exposure and prevent streaks or patches. Use a three-stage carbon filter or similar system to filter vapors and minimize environmental contamination. Always work in a well-ventilated area or use a fume hood to prevent inhalation of harmful vapors.

Advantages of Vapor Polishing

Vapor polishing is a quick process, making it suitable for treating complex shapes and intricate parts. The method can reach recessed areas that are difficult to polish manually, ensuring a uniform finish across the entire surface. It is particularly beneficial for intricate or complex parts where manual polishing would be time-consuming or impractical.

Challenges and Troubleshooting

If the polished surface becomes cloudy, ensure you are using the correct solvent and that the drying area is well-ventilated. For ineffective polishing, ensure thorough manual polishing beforehand and adjust vapor exposure times as needed.

Chemical Polishing

Chemical Polishing Polycarbonate

Chemical polishing is a technique used to smooth and enhance the surface finish of polycarbonate by utilizing a chemical solution to dissolve a thin layer of the material. This method is particularly effective for achieving high clarity and gloss, and it is suitable for complex shapes and geometries that are difficult to polish using mechanical methods.

Preparation of the Surface

Start by thoroughly cleaning the polycarbonate surface with a mild soap solution and a soft cloth to remove any dirt, dust, and contaminants. If the surface has deep scratches or significant imperfections, sand it with progressively finer grits of sandpaper, starting with 800 grit and moving to 1000, 1500, and 2000 grit.

Application of Chemical Polish

Choose an appropriate chemical polish, such as methylene chloride. This solvent is effective at dissolving a thin layer of polycarbonate to create a smooth finish. In a well-ventilated area or under a fume hood, use a clean, soft cloth or applicator to evenly apply the chemical polish over the prepared polycarbonate surface. Allow the chemical to react with the polycarbonate surface. This process, known as passivation, involves the chemical smoothing and shining the surface while dissolving the top layer of the material. Follow the manufacturer’s guidelines for the appropriate duration of this step.

Post-Polishing Care

After the chemical polish has completed its reaction, rinse the polycarbonate piece thoroughly with clean water to remove any residual chemicals. Allow the polycarbonate to air dry in a well-ventilated area. Avoid using heat sources to speed up the drying process, as this can cause additional stress and potential cracking.

Advantages of Chemical Polishing

Chemical polishing is less labor-intensive and requires minimal energy compared to mechanical methods. This technique is highly effective in restoring the smoothness and shine of polycarbonate surfaces, even in hard-to-reach areas. It can polish complex shapes and geometries that are difficult to manage with other methods.

Disadvantages of Chemical Polishing

The process involves hazardous chemicals, necessitating proper protective equipment and a controlled environment. Proper handling and disposal of chemical waste are essential to minimize environmental harm.

Safety Precautions

Always wear gloves, safety goggles, and protective clothing to prevent chemical exposure. Ensure good ventilation in your workspace or use a fume extractor to avoid inhaling toxic fumes. Perform the polishing process in a controlled area to manage fumes and spills effectively.

Best Practices

Test on a small, inconspicuous area before applying the chemical polish to the entire surface to ensure compatibility and effectiveness. Adhere to the instructions provided by the chemical polish manufacturer for the best results. Apply the chemical polish evenly and consistently to avoid streaks and patches on the polycarbonate surface.

Sanding

What is Sanding?

Sanding is a mechanical process that uses abrasive materials to smooth and even out the surface of polycarbonate. This method is particularly useful for removing deep scratches, kerf marks, and other imperfections, preparing the polycarbonate for further polishing techniques. Sanding is a fundamental step in achieving a high-quality finish, ensuring that the subsequent polishing processes are more effective.

Step-by-Step Guide to Sanding Polycarbonate

Preparation

  1. Clean the Surface: Start by cleaning the polycarbonate surface with a mild soap solution and a soft cloth to remove dirt and dust.
  2. Inspect for Imperfections: Check the surface for deep scratches or gouges. Identifying these areas will help you focus your sanding efforts where needed most.

Selecting Sandpaper

Choose sandpaper with different grits for each stage. Lower numbers are coarser, while higher numbers are finer.

  • Coarse Grit (200-400): For initial sanding to remove deep scratches and significant imperfections.
  • Medium Grit (800-1000): For smoothing the surface after coarse sanding.
  • Fine Grit (1500-2000): For final sanding to achieve a smooth, polished surface.

Sanding Process

  1. Initial Sanding: Begin with 200-400 grit sandpaper, sanding in a circular motion with water to reduce friction and prevent overheating.
  2. Progressive Sanding: Move to 800-1000 grit sandpaper. Continue sanding in circular motions, ensuring the surface remains wet. This step further smooths the surface and removes any scratches left by the coarse grit.
  3. Final Sanding: Use 1500-2000 grit sandpaper to achieve a smooth and even surface. Maintain the wet sanding technique, applying even pressure to avoid creating new scratches.

Tools and Techniques

  • Sandpaper: Use sandpaper of various grits as mentioned above.
  • Water Spray Bottle: Keep the surface wet with a spray bottle to ensure lubrication and minimize dust.
  • Sanding Block: Use a sanding block to maintain even pressure and avoid finger marks.

Benefits of Sanding

  • Scratch Removal: Removes deep scratches and prepares the surface for polishing.
  • Surface Smoothing: Creates a smooth surface that is ideal for subsequent polishing techniques.
  • Cost-Effectiveness: Sanding is a relatively inexpensive method compared to using specialized machinery for polishing.

Post-Sanding Polishing Techniques

After sanding, you can proceed with various polishing methods to achieve a high-gloss finish:

  • Vapor Polishing: Uses chemical vapors to smooth the surface and enhance transparency.
  • Buffing: Utilizes a buffing machine with polishing compounds to improve surface clarity.
  • Steam Polishing: Employs high-temperature steam to soften and smooth the polycarbonate surface.
  • Flame Polishing: Uses a controlled flame to melt and smooth edges, resulting in a crystal-clear finish.

Best Practices for Sanding

  • Consistent Pressure: Apply even pressure during sanding to avoid creating new scratches or uneven surfaces.
  • Keep the Surface Wet: Wet sanding helps to reduce friction and prevent overheating, which can damage the polycarbonate.
  • Inspect the Surface: Regularly inspect the surface during the sanding process to ensure all scratches and imperfections are being addressed.

By following these steps and best practices, you can effectively sand polycarbonate to prepare it for further polishing, achieving a smooth, clear finish ideal for various applications.

Flame Polishing

What is Flame Polishing?

Flame polishing is a technique used to achieve a high-gloss finish on polycarbonate surfaces by carefully melting and smoothing the material with a controlled flame. Flame polishing is especially useful for edges or spots that are hard to reach with mechanical tools.

Preparing Polycarbonate for Flame Polishing

Before starting the flame polishing process, it is essential to prepare the polycarbonate surface properly to achieve the best results.

Cleaning the Surface

Clean the polycarbonate surface with a mild soap solution and a soft cloth to remove dirt, dust, and debris, ensuring it is completely clean to prevent contaminants from affecting the polishing.

Sanding Imperfections

Inspect the polycarbonate for scratches. If you find any, sand them out using finer grits of sandpaper, starting with 200 grit and finishing with 800 grit. This step helps to create a smooth matte finish, which is crucial for effective flame polishing.

Ensure the polycarbonate is thoroughly dried after sanding. Moisture can interfere with the flame polishing process, leading to suboptimal results.

Performing Flame Polishing

Choosing the Right Burner

Choose a propane or acetylene burner because they produce hotter flames than butane. The higher temperature is essential for effective flame polishing.

Adjusting the Flame

Create a pencil flame by adjusting the burner’s output. This tapered flame shape allows for precise control over the area being polished.

Polishing the Surface

Hold the flame at an angle so that the brightly lit core (the cone of the flame) does not touch the polycarbonate. Gently move the flame along the edge of the polycarbonate in a smooth, continuous motion. This action will melt the surface slightly, which then solidifies to a crystal-clear finish.

Perform flame polishing in a well-ventilated area and wear protective gear like gloves and safety glasses to avoid fumes and protect against heat and sparks.

Best Practices for Flame Polishing

  • Practice on Scrap Material: Before polishing valuable pieces, practice on scrap polycarbonate to develop the necessary technique and ensure safety.
  • Controlled Environment: Perform the process in a controlled environment to prevent overheating or uneven polishing.
  • Consistent Motion: Maintain a steady and consistent motion with the flame to avoid creating hot spots or uneven areas on the polycarbonate surface.

Alternatives to Flame Polishing

While flame polishing provides a high-gloss finish, other methods can also be effective depending on the application:

  • Vapor Polishing: Uses chemical vapors to melt and smooth the surface, ideal for achieving high transparency.
  • Chemical Polishing: Involves applying a chemical solution to dissolve a thin layer of the polycarbonate, resulting in a smooth finish.
  • Mechanical Polishing (Sanding and Buffing): Uses abrasive materials and buffing compounds to smooth the surface, suitable for removing fine scratches and achieving a glossy finish.

Safety Considerations

  • Ventilation: Ensure good ventilation to avoid inhaling harmful fumes or combustion byproducts.
  • Heat Control: Monitor the temperature closely to avoid overheating the polycarbonate, which can cause warping or distortion.
  • Protective Gear: Wear protective clothing, including gloves and safety glasses, to prevent injury from heat or sparks.

Comparison of Polishing Methods

Vapor Polishing

Vapor polishing uses solvent vapors to smooth polycarbonate surfaces. The process begins by heating a solvent until it vaporizes, then directing the vapor onto the polycarbonate surface, causing it to melt slightly and fill in microscopic scratches.

Advantages:

  • Produces a high level of optical clarity.
  • Effective for complex geometries and intricate details.
  • Rapid process with immediate results.

Disadvantages:

  • Requires specialized equipment, proper ventilation, and safety precautions due to toxic fumes, which can increase costs.

Chemical Polishing

Chemical polishing uses a liquid solution to dissolve a thin layer of the polycarbonate surface, smoothing out imperfections. This method is efficient for high-volume production and can access intricate areas, but it involves hazardous chemicals that require strict safety measures and pose environmental concerns.

Advantages:

  • Efficient for high-volume production.
  • Can access and smooth intricate and recessed areas.
  • Less labor-intensive compared to mechanical methods.

Disadvantages:

  • Uses hazardous chemicals, requiring strict safety measures.
  • Can be less controlled than vapor polishing, potentially affecting finish quality.
  • Environmental and disposal concerns due to chemical usage.

Sanding

Sanding is a mechanical method involving abrasive materials to smooth the polycarbonate surface. The process typically starts with coarse-grit sandpaper and progresses to finer grits, followed by buffing with a polishing compound.

Advantages:

  • Inexpensive and accessible.
  • Provides control over the process.
  • Effective for removing deep scratches and preparing the surface for further polishing.

Disadvantages:

  • Time-consuming and labor-intensive.
  • Risk of introducing new scratches if not done correctly.
  • Requires multiple stages and careful attention to detail.

Flame Polishing

Flame polishing uses a controlled flame to melt the surface of the polycarbonate, resulting in a smooth, glossy finish. This method is particularly effective for polishing edges and small areas.

Advantages:

  • Quick and efficient for small areas and edges.
  • Produces a high-gloss finish.
  • Requires minimal equipment.

Disadvantages:

  • High risk of overheating and warping the polycarbonate.
  • Requires skilled handling to avoid damaging the material.
  • Limited to smaller areas and edges, not suitable for large surfaces.

Cost-Effectiveness and Efficiency

  • Vapor Polishing: High initial setup cost due to specialized equipment but efficient for high-volume and high-clarity applications.
  • Chemical Polishing: Moderate cost with efficient results for complex shapes, but ongoing costs due to chemical consumption and disposal.
  • Sanding: Low cost and widely accessible, though labor-intensive and time-consuming.
  • Flame Polishing: Low cost and quick for small areas, but requires skill and is not suitable for large surfaces.

Choosing the Right Method

  • High Optical Clarity: Vapor or chemical polishing is recommended for applications like lenses and windscreens.
  • Complex Geometries: Vapor and chemical polishing are ideal due to their ability to reach intricate areas.
  • Simple Geometries or Budget Constraints: Sanding is a cost-effective method for basic shapes and smaller projects.
  • Edge Polishing: Flame polishing is effective for achieving a clear, glossy finish on edges and small areas.

Best Practices for Polishing Polycarbonate

Properly preparing the polycarbonate surface is essential before polishing. Begin by cleaning the surface thoroughly with a mild soap solution and a soft cloth to remove any dirt, dust, and debris. Rinse with clean water and dry using a microfiber cloth to ensure no contaminants remain, as they can cause scratches during polishing.

Wet sanding is an effective method for removing scratches and imperfections. It involves using progressively finer grits of sandpaper while keeping the surface wet to prevent overheating and material loss. Start with coarse grit sandpaper (e.g., 800) and gradually move to finer grits (1000, 1500, 2000). This process smooths the surface and prepares it for further polishing. Vapor polishing, also known as solvent polishing, uses chemical vapors to smooth the surface of polycarbonate. This method is particularly effective for achieving high transparency. It involves heating a solvent until it vaporizes and then directing the vapor onto the polycarbonate surface. The vapor melts the surface slightly, filling in scratches and creating a smooth finish. This technique requires specialized equipment and careful handling due to the chemicals involved.

Chemical polishing uses solvents such as methylene chloride to smooth and refresh the polycarbonate surface. This method provides an even finish and can reach areas that are difficult to access with mechanical methods. It is faster than mechanical polishing, making it suitable for high-volume production. Apply the chemical polish evenly using a soft cloth or applicator, and allow it to react with the surface before rinsing and drying the polycarbonate thoroughly.

Mechanical polishing, using buffing pads and polishing compounds, can effectively refine the polycarbonate surface for a glossy finish. After wet sanding, apply a polishing compound using a microfiber cloth or buffing pad to remove fine scratches and enhance clarity. Be cautious to avoid applying too much pressure or heat, which could damage the polycarbonate. This method is ideal for achieving a glossy finish on flat surfaces and edges.

Steam polishing involves using high-temperature steam to gently soften and smooth polycarbonate surfaces, especially those with complex shapes. This method is particularly useful for parts with complex geometries where mechanical polishing may not be effective. Steam polishing requires specialized equipment and careful handling to avoid overheating. The steam softens the polycarbonate, allowing it to be smoothed out, and then it solidifies into a clear finish.

Key considerations include using proper safety equipment, allowing the part to cool naturally, and potentially repeating the polishing process for optimal clarity.

Common Challenges and Troubleshooting

Common Challenges

Polishing polycarbonate to achieve a clear and smooth finish can be challenging due to the material’s sensitivity and the precision required in the process. Here are some common challenges and how to address them:

Material Damage

  • Overheating: Polycarbonate can warp or crack if it overheats during mechanical or steam polishing. This can be avoided by using low-speed buffing machines and ensuring proper ventilation during steam polishing.
  • Chemical Damage: Using inappropriate chemical solvents can dissolve too much material, weakening the polycarbonate. Always use recommended solvents and follow safety guidelines to prevent excessive material removal.

Surface Imperfections

  • Scratches: New scratches can appear if the sanding grit progression isn’t gradual or if too much pressure is applied. It’s essential to use a proper grit progression and apply consistent, gentle pressure.
  • Cloudiness: Cloudiness can occur during chemical or vapor polishing if the surface is not properly prepared or if incorrect compounds are used. Proper surface preparation and selecting the right compounds are crucial for a clear finish.

Safety Concerns

  • Toxic Chemicals: Handling solvents like methylene chloride or Weld-ON 4 requires proper safety gear, such as gloves, goggles, and respirators, and working in a well-ventilated area to prevent exposure.
  • Fire Hazard: Flame polishing can pose a fire hazard if improper equipment or techniques are used. Always follow safety protocols and use the correct flame-polishing tools.

Troubleshooting

For Material Damage

  • Check Equipment: Ensure that all equipment, such as buffing machines or steam generators, is in good condition and used according to the manufacturer’s instructions.
  • Monitor Temperature: Use thermometers or temperature-controlled devices to prevent overheating. Keeping a close watch on the temperature can help avoid warping or cracking.

For Surface Imperfections

  • Gradual Sanding: Use a gradual grit progression during wet sanding, starting with a coarse grit and moving to finer grits, to avoid introducing new scratches. Ensure each stage is completed thoroughly.
  • Test Chemicals: Test a small, inconspicuous area first with new polishing compounds or solvents to ensure compatibility and effectiveness before applying them to the entire surface.

For Safety Concerns

  • Proper Ventilation: Work in well-ventilated areas when using chemical solvents to avoid inhaling toxic fumes. A fume hood or an exhaust system can significantly improve safety.
  • Safety Training: Ensure that personnel are trained in handling chemicals and operating equipment safely. Regular safety training sessions can help maintain a safe working environment.

Best Practices to Avoid Challenges

  1. Preparation: Clean and prepare the surface meticulously before polishing to avoid introducing debris or scratches. A clean surface ensures better results and reduces the risk of imperfections.
  2. Grit Progression: Use the correct sequence of sandpaper grits to prevent new scratches during wet sanding. Progress gradually from coarse to fine grits for a smooth finish.
  3. Polishing Compound Selection: Choose polishing compounds specifically designed for plastics to achieve a smooth finish without cloudiness. The right compound can make a significant difference in the quality of the finish.
  4. Safety Precautions: Always follow safety guidelines and use appropriate protective gear when handling chemicals or operating machinery. Personal protective equipment (PPE) is crucial for preventing injuries and exposure to harmful substances.

By understanding these challenges and incorporating best practices into the polishing process, you can effectively troubleshoot common issues and achieve high-quality polished polycarbonate surfaces.

Case Studies or Examples of Successful Polycarbonate Polishing Projects

Optical Clarity in Laboratory Equipment

Restoring optical clarity in laboratory equipment is one of the most notable successes in polycarbonate polishing. Vapor polishing is the preferred method for such applications due to its ability to achieve high levels of transparency. For example, polycarbonate lenses used in microscopes and spectrophotometers can regain their original clarity through this technique. The process involves exposing the polycarbonate to chemical vapors, which melt the surface slightly, filling in scratches and voids. This results in a smooth, glossy finish essential for high-precision optical instruments.

Automotive Components

Polycarbonate is widely used in the automotive industry for components such as dashboard trim and headlamp lenses. Mechanical polishing combined with buffing effectively achieves a high-gloss finish. The process starts with wet sanding using progressively finer grits of sandpaper to remove surface imperfections. This is followed by applying a polishing compound with a buffing wheel. The final result is a clear, scratch-free surface that enhances both the functionality and aesthetic appeal of automotive parts.

Medical Device Housings

Maintaining clarity and a smooth finish is crucial for medical device housings made from polycarbonate. These components often need a systematic approach that includes wet sanding and specialized polishing compounds. For instance, a project involving the polishing of polycarbonate housings for medical devices utilized progressively finer grits of sandpaper, starting from 800 grit and moving up to 3000 grit. The final step involved using a specialized polishing compound to achieve a mirror-like finish, reducing surface imperfections and enhancing the overall aesthetic and functional quality of the device.

Electronic Display Covers

Electronic display covers made from polycarbonate are prone to scratches, which can affect their clarity and functionality. Chemical polishing is particularly effective for restoring these surfaces. The process involves using a chemical solution to dissolve a thin layer of the polycarbonate, leveling out the surface. This method is especially useful for applications requiring a high-gloss finish. For example, chemical polishing has been successfully employed to restore the clarity of polycarbonate covers for electronic displays, ensuring they remain clear and functional.

Techniques and Best Practices

  • Surface Preparation: Ensuring the polycarbonate surface is clean and free of debris before polishing is crucial. Using mild soap and water followed by a plastic cleaner can effectively prepare the surface.
  • Progressive Sanding: For mechanical polishing, using wet sanding with grits progressing from coarse (400) to fine (3000) helps avoid overheating and prevents excessive material removal.
  • Vapor Polishing: This technique requires a controlled environment and suitable solvents like Weldon 4. It is ideal for complex shapes and achieving high transparency.
  • Chemical Polishing: Involves using chemicals such as methylene chloride to dissolve the surface layer, effectively achieving a high-gloss finish.
  • Safety Precautions: Always wear protective gear, including gloves and safety glasses, especially when using chemical polishes. Working in a well-ventilated area helps avoid inhaling harmful fumes.

These examples and techniques highlight the versatility and effectiveness of different polycarbonate polishing methods. By understanding and applying the appropriate techniques, it is possible to achieve high-quality finishes that enhance both the functionality and aesthetics of polycarbonate products.

Frequently Asked Questions

Below are answers to some frequently asked questions:

How do I polish polycarbonate effectively?

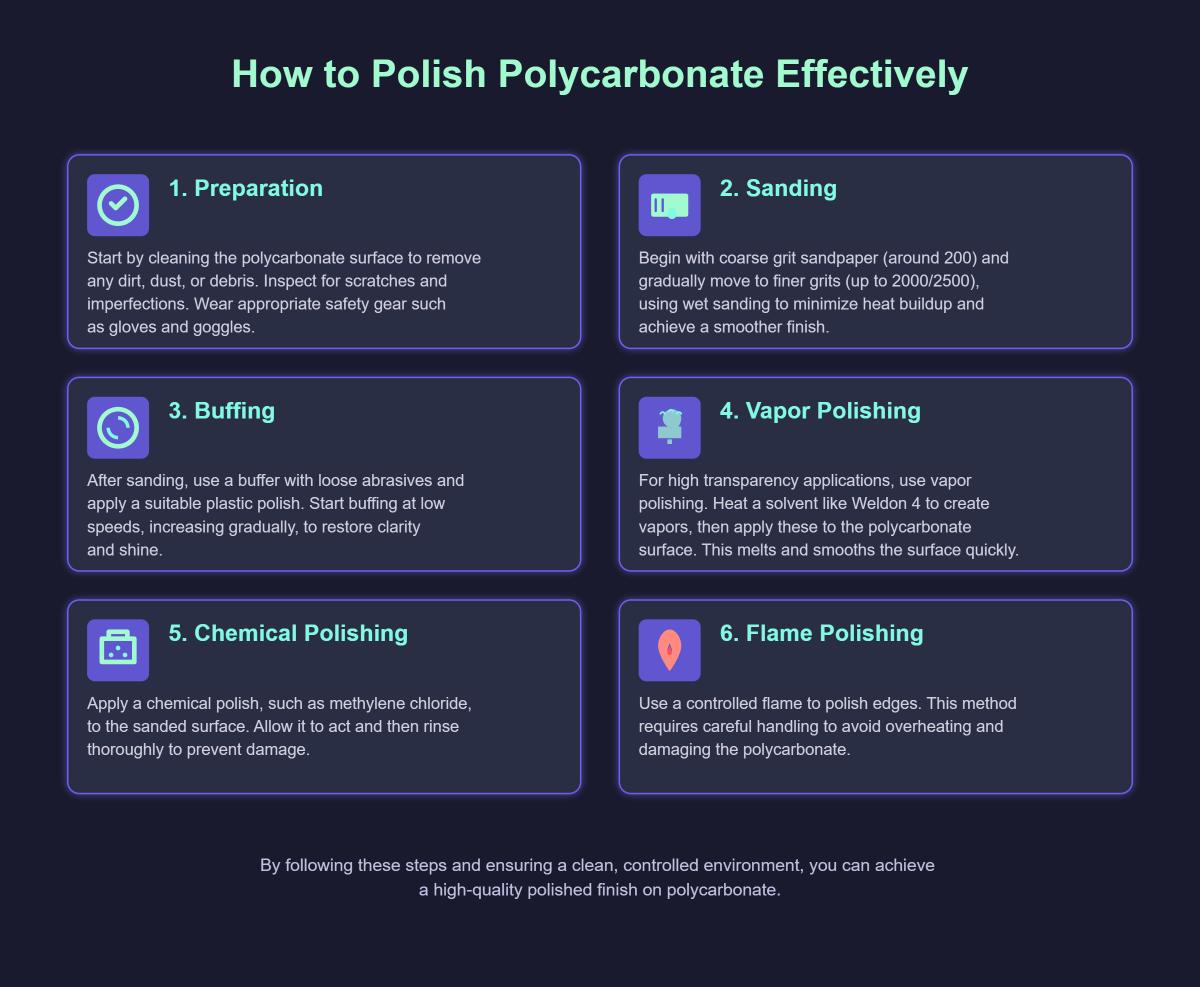
To polish polycarbonate effectively, follow these key techniques and best practices:

  1. Preparation: Start by cleaning the polycarbonate surface to remove any dirt, dust, or debris. Inspect for scratches and imperfections. Wear appropriate safety gear such as gloves and goggles.
  2. Sanding: Begin with coarse grit sandpaper (around 200) and gradually move to finer grits (up to 2000/2500), using wet sanding to minimize heat buildup and achieve a smoother finish.
  3. Buffing: After sanding, use a buffer with loose abrasives and apply a suitable plastic polish. Start buffing at low speeds, increasing gradually, to restore clarity and shine.
  4. Vapor Polishing: For high transparency applications, use vapor polishing. Heat a solvent like Weldon 4 to create vapors, then apply these to the polycarbonate surface. This melts and smooths the surface quickly.
  5. Chemical Polishing: Apply a chemical polish, such as methylene chloride, to the sanded surface. Allow it to act and then rinse thoroughly to prevent damage.
  6. Flame Polishing: Use a controlled flame to polish edges. This method requires careful handling to avoid overheating and damaging the polycarbonate.

By following these steps and ensuring a clean, controlled environment, you can achieve a high-quality polished finish on polycarbonate.

What are the best practices for polishing polycarbonate?

To polish polycarbonate effectively, follow these best practices:

  1. Preparation: Start by thoroughly cleaning the polycarbonate surface with mild soap and a soft cloth to remove any dirt or debris. Inspect the surface for scratches and imperfections that need addressing.
  2. Safety: Use appropriate personal protective equipment (PPE) such as gloves, goggles, and masks, especially when handling chemicals.
  3. Polishing Techniques:
    • Vapor Polishing: Ideal for achieving high transparency. Use chemical vapors like methylene chloride to melt the surface gently. This method requires controlled environments and careful handling of hazardous materials.
    • Mechanical Polishing: Involves wet sanding with progressively finer grits (starting around 800 and moving to 2000) followed by buffing with a plastic-specific polishing compound. Ensure the surface remains wet to avoid overheating and thinning the material.
    • Chemical Polishing: Uses solvents directly to dissolve the surface layer. This method is fast but involves direct contact with hazardous chemicals.
    • Steam Polishing: Suitable for complex shapes, using high-temperature steam to soften and smooth the surface. It requires specialized equipment and careful handling to prevent warping.
  4. Quality Control: After each step, inspect the surface for desired smoothness and clarity. Repeat processes as necessary to achieve the best finish.
  5. Maintenance: After polishing, maintain the polycarbonate by regularly cleaning it and avoiding abrasive materials that can cause scratches.

By adhering to these practices, you can achieve a high-quality, durable, and aesthetically pleasing finish on polycarbonate surfaces.

Can I use flame polishing for polycarbonate?

Yes, you can use flame polishing for polycarbonate, especially for polishing the edges. Flame polishing involves using a controlled flame, typically from a propane or acetylene burner, to melt the surface of the polycarbonate, resulting in a smooth, clear finish. Before starting, ensure the polycarbonate is dry and clean to avoid imperfections during the process. Sand the edges with progressively finer grits of sandpaper, then use a “pencil flame” to gently heat the edge without directly touching it. This technique is effective for edge polishing but is not suitable for large surfaces or deep scratches, where other methods like chemical or vapor polishing might be more appropriate. Always follow safety precautions, including wearing protective gear and working in a well-ventilated area.

What equipment and tools are required for polishing polycarbonate?

To polish polycarbonate effectively, you will need specific tools and equipment tailored for this material. Essential items include:

  1. Wet Sandpaper: Various grits (800, 1000, 1500, 2000) are used to progressively smooth out deep scratches and imperfections, preventing overheating and excessive material removal.
  2. Polishing Compounds: Specially formulated for plastics, these compounds help eliminate fine scratches and restore clarity.
  3. Buffing Pads: Microfiber cloths or soft buffing pads are used to apply polishing compounds in small circular motions for an even finish.
  4. Low-Speed Buffing Machine: Ideal for gentle, controlled buffing without applying too much pressure.
  5. Polycarbonate Rectification Kits: These kits include Micro-Mesh discs, wool and foam polishing pads, and liquid abrasives, often used with a cordless drill for larger areas.
  6. Vapor Polishing Equipment: A setup involving a solvent (e.g., Weldon 4), a heating device, and a controlled environment, requiring positive air pressure respirators for safety.
  7. Steam Generator and Nozzle: For steam polishing, which involves applying steam at 180-220°C to soften and smooth the polycarbonate surface.
  8. Cleaning Supplies: Mild soap solution, soft cloths for initial cleaning, and lint-free cloths for drying and inspection.

Using these tools and equipment, along with proper techniques and safety precautions, will help achieve a high-quality polished finish on polycarbonate surfaces.

How do I maintain the polished finish of polycarbonate?

To maintain the polished finish of polycarbonate, follow these essential steps:

  1. Daily Cleaning: Use a soft, non-abrasive cloth and a mild soap solution to gently clean the surface. Avoid harsh chemicals and abrasive cleaners that can scratch the polycarbonate.
  2. Preventive Measures: Handle the polycarbonate with care to prevent scratches. In high-wear environments, consider using protective coverings or coatings to safeguard the surface.
  3. Long-Term Care: Periodically apply a protective coating, such as Burnus, to protect against scratches and maintain the appearance. Regularly inspect the surface for signs of wear and perform touch-up polishing as needed to keep the polycarbonate clear and smooth.

By adhering to these maintenance practices, you can ensure that your polycarbonate surfaces remain polished, durable, and visually appealing.

You May Also Like
We picked them just for you. Keep reading and learn more!
Get in touch
Talk To An Expert

Get in touch

Our sales engineers are readily available to answer any of your questions and provide you with a prompt quote tailored to your needs.
MFG Shop Logo
Precision, Innovation, and Excellence in Machine Tools!
Follow on:

Contact details

[email protected]
© Copyright - MachineMFG. All Rights Reserved.

Get in touch

You will get our reply within 24 hours.