Comprehensive Guide to Copper Plating on Aluminium
Copper plating aluminium might sound like a daunting task, but with the right techniques and materials, it can be done…
Have you ever wondered why some electrical connections fail over time while others remain reliable? The secret often lies in the technique of tinning copper wire. For those who are already familiar with basic soldering but looking to perfect their skills, mastering the art of tinning can make all the difference in ensuring strong, durable connections. This guide will walk you through the entire process of tinning copper wire, from gathering the right tools and materials to executing the perfect tin coat. You’ll learn essential techniques to prevent common issues like tin fractures in screw terminals, discover the ideal temperature for tinning, and explore the benefits of using lead-free solder. Ready to elevate your electrical projects to the next level? Let’s dive into the step-by-step instructions and transform your wiring skills.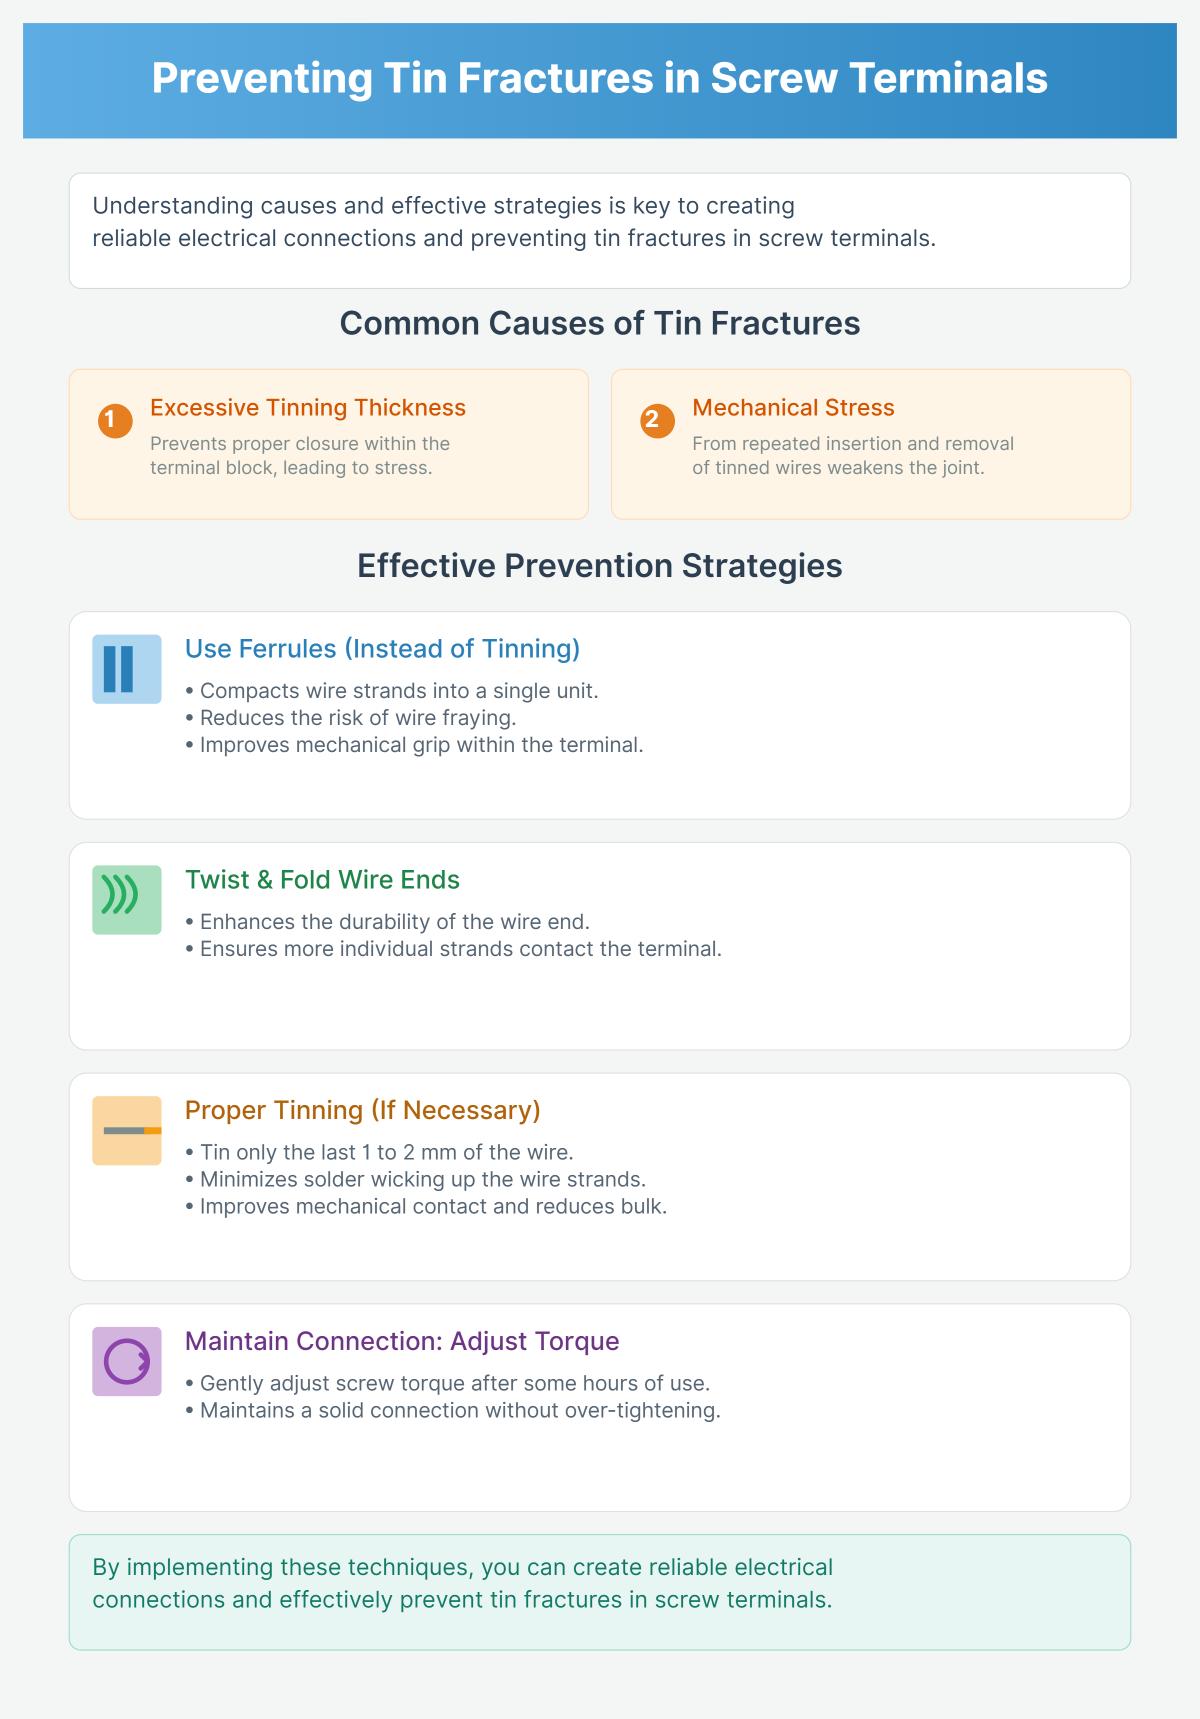
Tinning involves coating copper wire with a thin layer of tin, a technique widely used in electrical and electronic applications to improve performance and longevity. This process provides several benefits that enhance the overall functionality and durability of copper wires.
Copper is prone to oxidation when exposed to air, forming copper oxide, which increases electrical resistance and reduces conductivity. The tin layer acts as a shield, blocking oxygen and preserving the wire’s excellent electrical conductivity.
Tinned copper wire offers a smooth, clean surface that improves solderability, allowing solder to adhere more easily and uniformly, resulting in stronger and more reliable electrical joints. This is especially crucial in precision electronics and instrumentation where reliable connections are essential.
The tin coating significantly improves the wire’s ability to resist corrosion, making it ideal for use in harsh environments. Tinned copper wire is commonly used in marine settings, industrial plants, renewable energy installations, and other applications where exposure to moisture, chemicals, or temperature fluctuations is prevalent.
Tinned copper wire is preferred in marine environments due to its superior resistance to saltwater corrosion, ensuring long-lasting electrical connections in boats, ships, and offshore installations.
In renewable energy systems such as solar panels and wind turbines, tinned copper wire’s durability and resistance to environmental stresses make it a reliable choice.
In industrial plants and underground cabling, tinned copper wire offers reliable performance under varying conditions, including exposure to chemicals, moisture, and heat.
The tinning process involves cleaning the copper wire, applying a flux to improve adhesion, and then coating the wire with tin using methods like soldering or dip tinning, with careful heat control to ensure a consistent layer.
A soldering iron is essential for tinning copper wire as it heats the solder, allowing it to melt and coat the wire effectively. Opt for a soldering iron with adjustable temperature control to prevent overheating, which can damage the wire or insulation.
Wire strippers are used to remove the insulation from the copper wire carefully. Proper stripping length is important to ensure effective tinning and connection without damaging the wire strands.
Side cutters or wire cutters are necessary for trimming wire ends and cutting solder as needed during the tinning process.
Using a heat-resistant mat or work surface protects your workspace from heat damage during soldering. This tool is essential for maintaining a safe and clean work environment.
Tweezers or helping hands can hold small wires steady during the tinning process, ensuring precision and ease of handling. Safety gear, including protective safety goggles, heat-resistant gloves, and good ventilation or a fume extractor, is crucial for protecting yourself from burns and harmful fumes.
Copper wire is the base material to be tinned. Copper is highly conductive but prone to oxidation if left bare, making tinning beneficial for long-term durability.
Tin-based solder, usually rosin-core and designed for electrical work, is used to coat the copper wire. Lead-free solder is often preferred for safety and environmental reasons. The solder melts and forms a protective tin layer over the copper wire.
Flux, a chemical agent applied to the wire before soldering, removes oxidation and improves solder flow and adhesion. Using flux prevents poor solder joints and excessive smoke during tinning.
| Category | Item | Purpose/Notes |
|---|---|---|
| Tools | Soldering iron | Melts solder to coat wire |
| Wire strippers | Remove insulation cleanly | |
| Side cutters | Cut wires and solder | |
| Heat-resistant mat | Protects work surface from heat | |
| Tweezers or Helping Hands | Hold wire steady | |
| Safety goggles & gloves | Protection against burns and fumes | |
| Materials | Copper wire | Base conductor |
| Tin-based solder | Coating material | |
| Flux | Improves solder adhesion and flow |
The tin coating applied through soldering does not significantly alter the mechanical strength of the copper wire but adds corrosion resistance and improves heat tolerance and solderability. When tinning multi-strand wire, twist the wire strands neatly before tinning to ensure an even coating and prevent fraying. Safety precautions such as working in a ventilated area and careful handling of the hot soldering iron are crucial for a safe tinning process.
By preparing the correct tools and materials, and following proper tinning techniques, you can create durable, corrosion-resistant electrical connections that enhance the performance and longevity of your copper wiring projects.
Before beginning the tinning process, gather the following tools and materials to ensure a smooth and efficient workflow:
The first crucial step in preparing wire is stripping the insulation from the copper wire. Properly stripped wire ensures effective soldering and a reliable connection.
Cleaning the exposed copper surface is crucial to remove any oxidation, dirt, or grease, ensuring optimal adhesion of the tin layer.
Flux is essential for improving solder flow and adhesion, preventing oxidation during the soldering process.
Soldering is a widely used technique for tinning copper wire, which involves using a soldering iron to apply a thin layer of solder. This process enhances the performance and longevity of the wire.
Dip tinning is another effective method, especially suitable for bulk wire processing. This technique involves dipping the wire into a pot of molten solder to achieve a uniform tin coating.
Proper heat control is crucial in both soldering and dip tinning techniques to prevent damage to the wire and ensure a high-quality tin layer.
Visually inspect the tin coating on the copper wire to confirm it is smooth and uniform. The entire exposed area should be covered with no bare copper visible. Look for a consistent, shiny silver appearance without any lumps or gaps, indicating that the solder has flowed well and adhered correctly to the copper strands.
Examine the surface of the tinned wire closely. It should appear shiny and smooth. A dull, grainy, or ball-like surface may indicate a cold joint, which is a weak and unreliable solder connection. Cold joints happen when the solder doesn’t melt and flow correctly, usually due to insufficient heat or poor soldering technique. Identifying and correcting these defects is crucial for ensuring a strong electrical connection.
For multi-strand wires, check that the strands remain tightly twisted and fully coated with tin. The strands should not be frayed or separated. Proper alignment and coating prevent fraying, which can cause poor electrical connections and mechanical failures. Ensuring that the tinning process has fully encapsulated each strand will enhance the durability and reliability of the connection.
The shape and quality of the joint are important indicators of a successful tinning process. The tin coating should form a neat, conical shape at the wire end, which suggests that the heat was distributed evenly and the solder flowed properly. Avoid excess solder that creates large blobs or uneven surfaces, as these can introduce mechanical stress points and hinder fitting into connectors. A well-formed joint ensures both mechanical stability and electrical efficiency.
Flex the tinned wire gently near the coated end to check for cracking or peeling. The tinning should remain intact and not show any signs of brittleness. This test helps verify that the tin layer is not too thick or applied improperly, which could lead to mechanical failure under stress.
Ensure that the wire strands remain bound together without loosening or separating. This cohesion is essential for maintaining the structural integrity of the wire and preventing issues such as strand breakage or poor electrical conductivity. Properly tinned wires should exhibit strong mechanical bonding, with the strands firmly held together by the tin coating.
After tinning, it’s important to remove any residual flux from the wire. Flux residues can be corrosive and lead to long-term degradation of the connection. Use isopropyl alcohol and a small brush or cloth to clean the tinned wire thoroughly. Removing flux residue ensures that the connection remains clean and free from potential contaminants that could affect its performance.
Perform an electrical continuity test using a multimeter to ensure that the tinned wire maintains good electrical connectivity. Place the multimeter probes at the ends of the tinned wire and check for a low resistance reading. This test confirms that the soldering process has not introduced any breaks or weak points in the electrical path, ensuring a reliable connection.
Measure the resistance across the tinned wire and its connection point. Low resistance readings indicate a strong electrical connection, while higher resistance may suggest issues such as cold joints or incomplete tinning. Verifying the electrical properties of the tinned wire helps ensure its suitability for use in electrical applications.
| Issue | Description | Solution |
|---|---|---|
| Cold Joint | Dull, grainy solder with poor bonding | Reheat and apply fresh solder properly |
| Excessive Solder | Large blobs or uneven coating | Remove excess solder and retin carefully |
| Bare Copper Visible | Incomplete tinning exposing strands | Re-tin to cover all strands uniformly |
| Frayed Strands | Strands separated or loose | Twist strands tightly before tinning |
| Flux Residue | Sticky or crusty residue causing corrosion | Clean with isopropyl alcohol thoroughly |
Addressing these common issues promptly ensures that the tinned copper wire connections are robust, reliable, and meet the necessary electrical standards. Proper inspection and correction of any defects enhance the overall performance and safety of the electrical work.
Applying too much solder during the tinning process can cause the wire strands to fuse together into a rigid mass, reducing flexibility. This excessive solder application can prevent the terminal from clamping securely, risking loose connections or mechanical failure when the wire is inserted into screw terminals or clamps. To avoid this, heat the wire just enough to allow solder to flow and coat each strand lightly without creating a large blob. Use a fine-tipped soldering iron and apply solder sparingly, aiming for a thin, even coating that maintains the wire’s flexibility.
Tinning wire without properly stripping and cleaning it first leads to poor solder adhesion and weak joints. Residual insulation, oxidation, or dirt on the wire surface prevents solder from bonding well, resulting in unreliable electrical and mechanical connections. To avoid this, strip the wire insulation cleanly using the correct-sized wire strippers without nicking or damaging the strands. Clean the exposed copper by lightly abrading with fine sandpaper or a wire brush to remove oxidation, and apply flux to the wire before tinning to improve solder flow and bonding.
Tinning wires intended for screw terminals can cause the solder to crack under pressure, leading to loose connections. When the terminal clamp compresses a tinned wire, the solder can crack and separate from the copper strands, creating voids and unreliable contact over time. To avoid this, use bare copper wire twisted tightly to hold strands together, allowing the terminal to clamp directly onto the wire for a gas-tight, secure connection. If tinning is necessary, ensure minimal solder is used and verify the wire fits properly in the terminal.
Using solder not meant for electrical wiring, such as plumbing solder, can result in corrosive connections and poor electrical conductivity. Electrical solder typically contains rosin-based flux and is usually a tin-lead alloy or a lead-free alternative with silver content. Using improper solder can degrade connection quality and safety over time. To avoid this, use solder specifically designed for electrical applications, ideally with a rosin flux core. Silver-bearing electrical solder improves mechanical strength and corrosion resistance.
Not applying enough heat or rushing the soldering process results in cold solder joints—dull, grainy, and prone to cracking. Cold solder joints have poor mechanical and electrical properties, increasing resistance and risk of failure. To avoid this, preheat the wire sufficiently before applying solder. Allow solder to flow smoothly and wet all strands uniformly, and remove heat only after the solder has formed a shiny, smooth coating.
Creating a safe and efficient workspace is essential when tinning copper wire. The area should be well-ventilated to avoid inhaling fumes from soldering and flux. Proper ventilation reduces the risk of respiratory issues and provides a more comfortable working environment by directing fumes away from the work area. Position fans or use an exhaust system to maintain good airflow.
Wearing appropriate protective gear is crucial for safety during the tinning process. Safety goggles protect your eyes from solder splashes and debris, while heat-resistant gloves prevent burns from the hot soldering iron and molten solder. Long sleeves and closed-toe shoes further minimize the risk of burns and injuries.
Effective heat management prevents accidents and damage to your workspace. Use a heat-resistant mat to protect your work surface from heat damage. Always keep the soldering iron in a secure stand when not in use, and never leave it unattended while it’s hot. Ensure the soldering iron’s temperature is set correctly to avoid overheating, which can damage the wire and produce excessive fumes.
Applying flux correctly is crucial for a clean and efficient tinning process. Flux helps the solder flow smoothly and adhere well to the copper wire. Apply flux sparingly to minimize smoke and residue, which can cause irritation and health issues. Ensure the flux is compatible with the solder you are using to avoid chemical reactions that could compromise the quality of the solder joint.
Maintaining fire safety protocols is essential when working with hot soldering irons and flammable materials. Keep the workspace clear of flammable items such as paper, cloth, and solvents. Have a fire extinguisher nearby and ensure it is appropriate for electrical fires. Avoid working near open flames or sparks, and follow local fire safety regulations to mitigate risks.
Solder fumes can be hazardous, so it’s important to minimize inhalation. Use a fume extractor or work in a well-ventilated area to reduce exposure. Take regular breaks to step away from the fumes and allow fresh air into your workspace. If the fumes become overwhelming, consider using a respirator designed for soldering activities to protect your respiratory health.
Electrical safety is paramount when working with soldering equipment. Ensure all electrical tools are in good condition and check for any damaged cords or plugs before use. Use grounded outlets and avoid overloading circuits. Follow proper electrical safety procedures to prevent shocks and electrical fires.
By adhering to these safety considerations, you can create a secure and efficient environment for tinning copper wire, ensuring both your safety and the quality of your work.
Bare copper is preferred for many standard electrical installations due to its excellent electrical conductivity. However, bare copper is prone to oxidation when exposed to air, increasing electrical resistance over time, whereas tinning copper wire involves coating it with a thin layer of tin that provides a barrier against oxidation. While tinning slightly increases the wire’s resistance, this increase is negligible for most applications and does not significantly impact the wire’s overall conductivity.
One of the primary advantages of tinned copper wire over bare copper is its enhanced corrosion resistance. The tin coating protects the copper from corrosive environments, such as those found in marine, industrial, or chemically aggressive settings. Tinned copper wire is particularly beneficial in humid or salty environments where bare copper would quickly degrade. This corrosion resistance extends the wire’s lifespan and maintains its reliability in challenging conditions.
Tinned copper wire is highly recommended for marine and outdoor applications due to its superior resistance to saltwater corrosion. The protective tin layer prevents rapid degradation in these environments, ensuring long-lasting electrical connections in boats, ships, and other marine equipment.
In industrial settings where wires are exposed to chemicals and varying temperatures, tinned copper wire provides additional protection against corrosive agents. The tin coating helps maintain the integrity of the wire, ensuring reliable performance in harsh industrial environments.
For standard residential wiring and indoor applications, bare copper wire is often sufficient. It offers cost-effectiveness and superior conductivity in environments where the risk of corrosion is minimal. However, in areas prone to high humidity or where long-term reliability is crucial, tinned copper may still be preferred.
Bare copper wire is generally less expensive than tinned copper wire due to the additional processing required to apply the tin coating. For budget-conscious projects, bare copper is cost-effective as long as the environment does not require the extra protection that tinning provides.
While tinned copper wire has a higher initial cost, its benefits in terms of longevity and reduced maintenance can offer better long-term value. In environments where corrosion is a concern, the extended lifespan and reliability of tinned copper wire can offset the higher upfront expense, resulting in cost savings over time due to fewer replacements and repairs.
Regular maintenance is needed to prevent oxidation in bare copper wire, as oxidation can degrade its performance. Tinned copper wire, on the other hand, requires less maintenance due to the protective tin layer, making it a more practical choice for applications where ongoing upkeep is challenging or impractical.
The tin coating on tinned copper wire improves its solderability, providing a smooth, clean surface for solder to adhere to. This makes tinned copper wire easier to work with, especially in precision electronics and instrumentation where strong, reliable connections are essential. In contrast, bare copper wire may require additional preparation, such as cleaning and flux application, to achieve optimal solder joints.
Thermal expansion occurs when materials expand upon heating and contract when cooled. This property is particularly relevant in electrical applications involving tinned copper wire. Copper and tin have different coefficients of thermal expansion, which means they expand at different rates when subjected to temperature changes, potentially leading to issues such as loose terminations and fractures in the tin coating, compromising the integrity of electrical connections.
To address the differential expansion between copper and tin, select materials that can accommodate these differences. Use terminal blocks and connectors designed with materials that have similar thermal expansion coefficients to copper and tin. This reduces stress and potential loosening during temperature fluctuations. Additionally, employ flexible connectors that allow slight movement or flexibility to absorb expansion and contraction without compromising the connection.
Implementing secure tightening methods can help maintain the integrity of connections despite thermal expansion. Use screw terminals that can be adjusted to compensate for changes in wire dimensions. Tighten screws firmly but check regularly to ensure they remain secure. Alternatively, utilize clamp connectors that provide a tight grip on the wire while allowing for some flexibility. This helps maintain a secure connection even as the wire expands and contracts.
Effective thermal management can minimize the impact of thermal expansion on tinned copper wire. Integrate heat sinks or cooling systems into electrical designs to keep the operating temperature stable. This reduces the extent of expansion and contraction cycles. Employ temperature control measures to prevent excessive heating of wires, such as using temperature-regulated soldering irons and avoiding high-current loads that generate excessive heat.
Regular inspection and maintenance of connections are crucial to prevent issues caused by thermal expansion. Periodically check and tighten screw or clamp terminals to ensure they remain secure despite thermal cycling. Inspect connections for signs of wear, loosening, or damage, and replace or retighten any compromised connections promptly.
Incorporate design strategies that account for thermal expansion when planning electrical systems. Choose materials with compatible thermal expansion coefficients, design flexible mounting systems, and use stress relief techniques like looped wire configurations to absorb expansion and contraction without pulling on connections. These strategies enhance the durability and reliability of electrical systems, ensuring secure and effective connections.
By understanding and addressing thermal expansion effects, you can ensure the reliability and longevity of tinned copper wire connections in various electrical applications. These techniques help maintain secure and effective connections, minimizing the risks associated with thermal expansion.
Below are answers to some frequently asked questions:
To prevent tin fractures in screw terminals, it is essential to follow proper tinning techniques and consider alternative methods for securing wire connections. Tin fractures often occur due to excessive tinning thickness, which can prevent proper closure within the terminal block, and mechanical stress from repeatedly inserting and removing the tinned wires.
One effective strategy is to use ferrules instead of tinning. Ferrules compact the wire strands into a single unit, reducing the risk of fraying and improving the mechanical grip within the screw terminal. Alternatively, twisting and folding the wire ends can enhance durability by ensuring more strands contact the terminal.
If tinning is necessary, it’s advisable to tin only the last 1 to 2 mm of the wire to minimize solder wicking and improve mechanical contact. Additionally, gently adjusting the screw torque after some hours of use can help maintain a solid connection without over-tightening.
By understanding these techniques and potential pitfalls, you can create reliable electrical connections in screw terminals and prevent tin fractures effectively.
The ideal temperature for tinning copper wire using a soldering iron is typically between 350°C to 370°C (662°F to 698°F). This range ensures that the solder melts properly, adheres to the wire, and forms a smooth, non-oxidized layer. When using a solder pot, the temperature should be set between 700°F to 800°F (371°C to 427°C). These temperature ranges are crucial for achieving a uniform tin coating, enhancing the wire’s durability, corrosion resistance, and solderability. Always ensure proper ventilation and use appropriate protective gear to maintain safety during the tinning process.
Yes, lead-free solder can be used for electrical tinning of copper wire. Lead-free solders are increasingly preferred due to environmental regulations and health concerns. These solders typically consist of over 95% tin, often alloyed with small amounts of silver, copper, or other metals, such as in the SAC 305 alloy (96.5% tin, 3% silver, 0.5% copper).
When using lead-free solder, there are several considerations to ensure effective tinning:
By following these guidelines, lead-free solder can provide strong, conductive, and environmentally friendly tinning for copper wires in electrical connections.

