How to MIG Weld Chrome Plated Steel Safely: A Beginner’s Guide
Imagine working on a sleek automotive project, and you need to weld chrome plated steel parts together. You might be…
Ever wondered how to transform a simple chrome pipe into a seamless piece of craftsmanship? Welding chrome pipe might seem daunting for beginners, but with the right guidance, anyone can master this valuable skill. In this comprehensive guide, we’ll walk you through the entire process, from understanding the unique challenges of welding chrome to preparing the pipe and selecting the right equipment. You’ll learn about the importance of surface preparation, the step-by-step TIG welding process, and the various welding positions and joint types you might encounter. By the end of this guide, you’ll have a clear roadmap to confidently weld chrome pipes with precision and safety. Ready to dive in and start your welding journey? Let’s get started!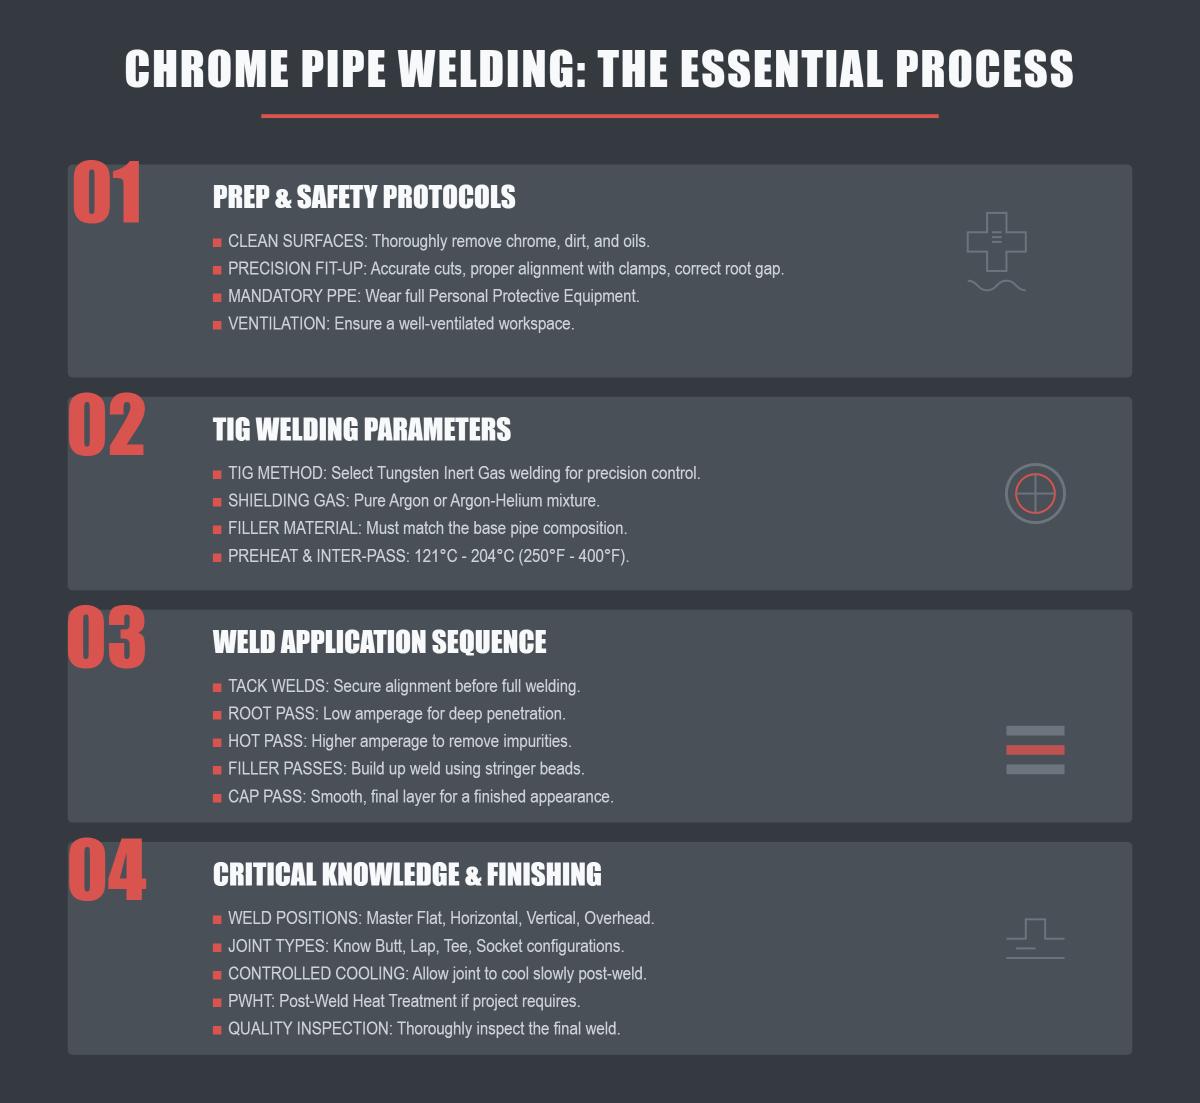
Chrome pipe, also known as chrome alloy pipe, is a type of steel pipe. It contains chromium and other elements like molybdenum and vanadium. This specific composition enhances the pipe’s durability, resistance to oxidation, and corrosion, making it ideal for use in high-stress environments. Chrome pipes are commonly used in industries such as oil and gas, power generation, and chemical processing. Their ability to withstand high temperatures and pressures, along with their long service life, makes them a preferred choice for critical applications.
Proper material preparation is crucial when welding chrome pipe. The pipe’s surface must be thoroughly cleaned and deburred before welding. Any chrome plating near the weld area should be removed to prevent contamination, which could weaken the weld.
Maintaining appropriate temperature control is essential. Preheat and interpass temperatures need careful monitoring. Typically, these temperatures range between 121°C to 204°C (250°F to 400°F). Proper temperature control helps prevent temper brittleness and ensures a strong weld.
Selecting the right filler material is crucial for a successful weld. The filler material should match the base metal composition to ensure compatibility and maintain the integrity and strength of the weld. This selection process can be complex and requires precise knowledge of the materials involved.
Post-weld heat treatment is another critical step in the welding process. This treatment helps relieve residual stresses that occur during welding and ensures the integrity and mechanical properties of the welded material.
TIG welding (Tungsten Inert Gas) is the preferred method for chrome pipes. TIG welding provides the precision and control needed to produce clean, oxidation-free welds. This technique uses a tungsten electrode to deliver the weld current and shielding gas to protect the weld pool from atmospheric contamination.
The choice of shielding gas is essential in TIG welding. Typically, argon or a mixture of argon and helium is used. These gases help protect the weld pool from atmospheric elements that could cause oxidation or contamination.
Understanding different welding positions and joint types is vital for achieving high-quality welds. Common welding positions include flat, horizontal, vertical, and overhead. Joint types can vary and include butt, lap, tee, and socket joints, each requiring specific techniques and considerations.
Welding chrome pipes requires several passes:
By carefully following these steps and techniques, welders can overcome the unique challenges of welding chrome pipes and ensure a high-quality, durable weld.
TIG (Gas Tungsten Arc Welding) machines are highly recommended for welding chrome pipes due to their precision. They work with a non-consumable tungsten electrode and require separate filler material. When choosing a TIG welding machine, look for adjustable current settings, which allow you to control the heat based on the pipe’s thickness. A foot pedal for heat control is also very useful, providing more flexibility during the welding process.
Tungsten electrodes are crucial for creating a stable arc and must be properly sharpened to ensure a smooth and consistent weld. Additionally, filler rods should match the alloy composition of the chrome pipe to ensure compatibility and strength.
Argon or an Argon-Helium mix is used as shielding gas to protect the weld pool from contamination, ensuring a clean and oxidation-free weld.
Proper preparation is essential for creating strong, durable, and flawless welds on chrome pipes. Neglecting this step can lead to poor weld quality, increased risk of weld defects, and potential failure of the welded structure.
Before welding, remove any chrome plating around the weld area. Chrome plating can contaminate the weld pool, leading to weak welds and increased risk of cracking. Use a grinding wheel or sanding disc to carefully remove the chrome plating, exposing the base metal.
Thoroughly clean the surfaces to be welded, removing rust, oxides, oils, and grease using wire brushes, grinding wheels, or buffing wheels. Follow up by wiping the cleaned surfaces with acetone to eliminate any remaining contaminants. Ensure the surfaces are dry before proceeding.
Smooth and deburr the pipe edges to ensure a proper fit-up and welding penetration. Use a deburring tool or file to remove any burrs or sharp edges, which can hinder the welding process.
Preheat the chrome pipe to reduce cracking and thermal stress. Typically, preheat to between 121°C (250°F) and 204°C (400°F). Use a heating torch or oven to apply heat evenly, and monitor the temperature with thermocouples or infrared thermometers to maintain the required heat throughout the welding process.
Choose the right joint type for your project. Common options include butt joints for strong welds, lap joints for overlapping pipes, tee joints for 90-degree connections, and socket joints for plumbing and industrial piping.
Ensure a root gap equal to or slightly larger than the filler rod’s diameter for full penetration. Use spacing wedges or gauges to keep the gap consistent. Secure the pipe ends with line-up clamps or jigs to prevent movement and ensure proper alignment during welding.
Place small tack welds at strategic points, such as the corners or every few inches along the pipe circumference. Position tack welds off the final weld path to avoid creating weak spots. After tack welding, check the alignment of the pipes and make any necessary adjustments before proceeding with continuous welds.
Properly preparing the surface is crucial for welding chrome pipes to achieve a strong, durable, and defect-free weld. Chrome pipes, especially those made from chrome-moly (chromium-molybdenum) steel, are highly sensitive to contamination. Effective surface preparation involves several steps to remove contaminants and ensure proper fit-up and alignment.
Thoroughly clean the pipe ends to eliminate dirt, grease, oil, scale, and metal chips. Use wire brushes, grinders, files, or buffing wheels to clean the surface thoroughly, preventing oxidation and contamination that could cause weld defects like porosity and cracking.
If the pipe has chrome plating, remove the plating around the weld zone to ensure proper fusion and avoid contamination. Use a grinder or sander to remove the chrome plating and expose the base metal.
Smooth out any sharp edges or burrs on the pipe ends. This ensures tight, even mating surfaces and helps prevent weld defects. A deburring tool or file can be used to remove any burrs or sharp edges.
Correct fit-up and alignment are essential for a successful weld. Use line-up clamps or jigs to hold the pipes securely in position. Ensure the root spacing (usually equal to or greater than the filler rod diameter) is consistent to avoid distortion and ensure full penetration of the weld.
Place small tack welds at key points to securely hold the pipes in place without warping. Tack welds should be positioned off the final weld path to prevent creating weak spots.
Heat treatment is a critical process both before and after welding chrome pipes. It helps avoid welding defects, improves weld quality, and enhances the mechanical properties of the welded joint.
Preheating the pipe before welding is essential to reduce thermal shock, control the cooling rate, and prevent cracking, especially temper brittleness, in chrome-moly steel welds.
Perform post-weld heat treatment after welding to relieve residual stresses and reduce hardness in the heat-affected zone. This helps prevent cracking and brittleness.
By following these steps for surface preparation and heat treatment, you can significantly improve the quality and longevity of welds on chrome pipes.
Thoroughly remove all chrome plating, oxides, burrs, and contaminants within a 3-inch radius of the welding area. Use grinding tools to remove the chrome plating near the joint, and then clean the surface with acetone wipes to eliminate oils and residues. This step is crucial to prevent weld contamination and ensure a strong fusion.
Cut the pipe ends accurately and choose the joint type. For pipes, butt joints are commonly used. Deburr the edges and ensure the pipe ends fit tightly together with minimal gaps. Proper alignment is very important to avoid distortion during the welding process.
Use line-up clamps or a jig to firmly hold the pipe ends in place. Tack weld the pipe in at least four evenly spaced locations to maintain alignment during welding. Larger pipes will need more tack welds for better stability.
Choose a clean tungsten electrode with an appropriate tip shape. Whether it’s sharp or slightly rounded depends on the specific weld you’re doing. The tungsten electrode is essential for creating a stable and precise arc, which is needed for welding chrome pipes.
Argon or a mix of argon and helium is the recommended shielding gas. This gas protects the weld pool from oxidation and contamination from the atmosphere during the welding process.
Adjust your TIG welding machine to the correct current based on the thickness and material of the pipe. When welding chrome pipe, preheat the pipe to a temperature ranging from 121°C to 204°C (250°F to 400°F). This helps prevent brittleness and stress in the weld zone.
Start with the root pass, which forms the foundation of the weld. Keep your hand steady and maintain a consistent arc length and angle to ensure full penetration and fusion. The root pass weld should be clean and free of any defects.
After completing the root pass, perform a hot pass with slightly higher amperage. This pass burns off impurities in the root weld pool and helps create a uniform weld bead.
Add filler metal in subsequent passes to fill the weld groove. You can choose to use stringer beads (straight beads) or weave beads, depending on your experience and the joint’s geometry. Stringer beads are easier for beginners and give better control over heat input.
The final pass, the cap pass, is used to smooth and shape the weld bead for a good appearance and integrity. Keep a consistent speed and angle to avoid overheating or undercutting.
Since chrome pipes are cylindrical, you’ll likely need to work in different positions such as flat, horizontal, vertical, or overhead as the pipe rotates. Mastering these positions is important for achieving consistent weld quality.
Maintain a consistent tungsten angle, usually 15° to 20° from vertical, and keep the arc length short. This helps you control the weld puddle.
Move slowly and steadily to prevent burning through the pipe or overheating, which can damage the chrome alloy.
Let the weld cool down slowly to avoid cracking or temper brittleness.
Carry out PWHT according to the type of chrome alloy. This helps relieve residual stresses and restore the mechanical properties of the weld.
Do a hardness test and visually inspect the weld for defects like cracks, porosity, or inclusions. For high-quality welds, you may also want to use X-rays to check the internal integrity.
Welding positions play a crucial role in determining the quality and ease of welding chrome pipes. Each position comes with its own set of challenges and techniques. Here are the primary welding positions:
The flat position is the most straightforward and is ideal for beginners. In this position, the pipe is placed horizontally, allowing welders to work from above. The weld pool is easier to control because gravity helps to keep the molten metal in place.
In the horizontal position, the pipe remains stationary while the welder rotates around it, requiring more skill to manage the molten metal flow horizontally. It’s often used in situations where the pipe cannot be moved.
The vertical position is more challenging because welders must control the weld pool to avoid drips and ensure a consistent bead. The pipe is oriented vertically, and welding is performed upwards or downwards. This position is commonly used in construction and repair jobs.
The overhead position is the most difficult due to gravity affecting the weld pool. Welders work with the pipe above their head, which requires high skill to prevent molten metal from falling and causing defects. Proper technique and equipment are essential to manage this position effectively.
Choosing the right joint type is essential for ensuring the integrity and strength of the weld. Here are the common joint types used in chrome pipe welding:
Butt joints are used to join two pipes of equal diameter end – to – end. This joint type allows for full penetration welds, making it ideal for high – pressure applications. Proper alignment and fit – up are crucial to ensure a strong weld.
Lap joints are used when one pipe overlaps another. This type of joint provides flexibility in design and is often used in situations where pipes of different diameters need to be connected. It’s important to ensure that the overlapping area is adequately welded to prevent leaks.
Tee joints are used to join a pipe to a perpendicular surface, creating a T – shaped configuration. This joint type is commonly used in branching configurations, such as in plumbing systems. Proper technique is needed to ensure the strength and integrity of the weld at the intersection.
Socket joints involve inserting one pipe into the socket – like end of another pipe. This type is often used in plumbing and industrial piping systems for easy assembly and disassembly. The socket joint provides a secure connection but requires precise welding to ensure no gaps or weaknesses.
When welding chrome pipes, several key considerations must be kept in mind:
By understanding and mastering different welding positions and joint types, welders can significantly improve the quality and durability of their welds on chrome pipes.
A common mistake in welding chrome pipes is inadequate surface preparation. Contaminants such as oxides, burrs, and residual chrome plating can lead to weak welds and defects.
Using an incompatible shielding gas (like CO₂) or a filler wire that doesn’t match the base metal can result in poor weld quality and compatibility issues.
Proper alignment of the pipes is crucial for a strong weld. Misalignment can cause weld defects and structural weaknesses.
Not properly preheating or controlling interpass temperatures can cause cracks and make the weld brittle.
Maintaining a consistent welding technique is essential for producing high – quality welds.
Post – weld heat treatment is critical for relieving residual stress and ensuring the durability of the weld.
Proper sequencing of weld passes is necessary to achieve a strong and defect – free weld.
Controlled cooling is important to prevent cracks and distortion in the welded joint.
Welding in complex positions requires advanced skills and practice.
Below are answers to some frequently asked questions:
For beginners, the correct process for welding chrome pipe starts with preparation and safety. Clean the pipe surfaces to remove chrome plating, dirt, and oil. Cut and fit the pipes accurately, using clamps to maintain alignment and a proper root gap. Wear appropriate PPE and work in a well – ventilated area.
Select TIG welding for precision. Use pure argon or an argon – helium mix as shielding gas and choose filler material that matches the pipe’s composition. Preheat the pipe to 121°C – 204°C (250°F – 400°F) and maintain this inter – pass temperature.
Apply tack welds to hold the pipes. Begin with a low – amperage root pass for penetration, followed by a higher – amperage hot pass to clean impurities. Use stringer beads for filler passes and finish with a thin, smooth cap pass.
Be familiar with common welding positions (flat, horizontal, vertical, overhead) and joint types (butt, lap, tee, socket). After welding, let the joint cool slowly, perform post – weld heat treatment if required, and inspect the weld for quality.
Preparing a chrome pipe for welding involves several essential steps to ensure a high-quality weld. First, remove the chrome plating near the weld area using abrasive tools like a wire brush or Scotch-Brite pad. This prevents contamination, as chrome can vaporize during welding. Next, ensure the pipe is free from burrs and any decarb layer (a mill scale type) that might be present; these can obstruct the welding process and cause weld contamination.
Accurate cutting and fitting of the pipe joints are crucial, as precise alignment affects weld quality. Use line-up clamps or jigs to hold the pipes securely in place. Preheating the pipe to a temperature range of 121-204°C (250-400°F) is important, especially for chrome-moly steel, to prevent thermal shock and temper brittleness. Maintain specific interpass temperatures to avoid cracking and ensure uniform cooling.
For TIG welding, use a TIG welding torch with a tungsten electrode for a stable arc, and select filler materials that match the base metal properties. After welding, perform post-weld heat treatment (PWHT) to relieve stresses and achieve the desired material properties, typically involving heating the weld to a specific temperature for a set duration. Conduct hardness testing to verify the weld quality. Following these steps ensures the chrome pipe is well-prepared for welding, resulting in strong, high-quality welds.
For welding chrome pipe, which is typically made from alloyed steel with chromium, molybdenum, and sometimes vanadium, the recommended welding technique is TIG (Tungsten Inert Gas) welding. It offers precision and helps maintain a clean weld pool. Shielding gases like argon or a mix of argon and helium are used to prevent contamination.
The necessary equipment includes a TIG welding machine, a tungsten electrode, filler material that matches the alloy composition of the chrome pipe, and the appropriate shielding gas. Proper joint preparation and alignment, along with specific passes like the root, hot, and filler passes, are also key aspects of the welding process.
In chrome pipe welding, understanding the common welding positions and joint types is crucial for achieving quality welds.
Welding Positions:
Joint Types:
Proper preparation, such as removing chrome plating and cleaning the weld area, along with preheat and post-weld heat treatment, is essential for successful chrome pipe welding.
Preheat and post-weld heat treatment (PWHT) are critical steps in welding chrome pipes, especially those made of chrome-moly steel, to ensure weld integrity and quality.
Preheating involves heating the area around the weld to a specific temperature range, typically between 250°F to 400°F (121°C to 204°C). This process reduces the cooling rate of the weld, which helps to minimize the risk of cracking and ensures a uniform microstructure. Preheating also drives out moisture, reducing hydrogen buildup that can lead to hydrogen cracking, and redistributes stresses gradually to prevent distortion.
Post-weld heat treatment follows welding and involves heating the welded area to around 1350°F ± 25°F (732°C ± 14°C) for several hours. This process relieves residual stresses that can form during cooling, enhancing the mechanical properties of the weld and making it more durable and resistant to corrosion. The controlled cooling that follows ensures the material achieves the desired microstructure and mechanical properties.
Both preheat and PWHT are essential to producing high-quality welds on chrome pipes and are often specified in Welding Procedure Specifications (WPS) to meet industry standards.

